800 Years of Limerick, from King Johns to the Clarion…

I had a walkabout around Limerick the other evening. John Hickey (another local photographer) and myself took a stroll around to see what we could see. The light was wonderful, so just about sunset we went into the Strand Hotel and asked at reception if we could go up to the top floor. Thanks to the very nice person on reception, who checked with the boss in the back room and up we headed.

As the sun went down there was a lovely colour to the sky over Thomond Park, the local rugby grounds.

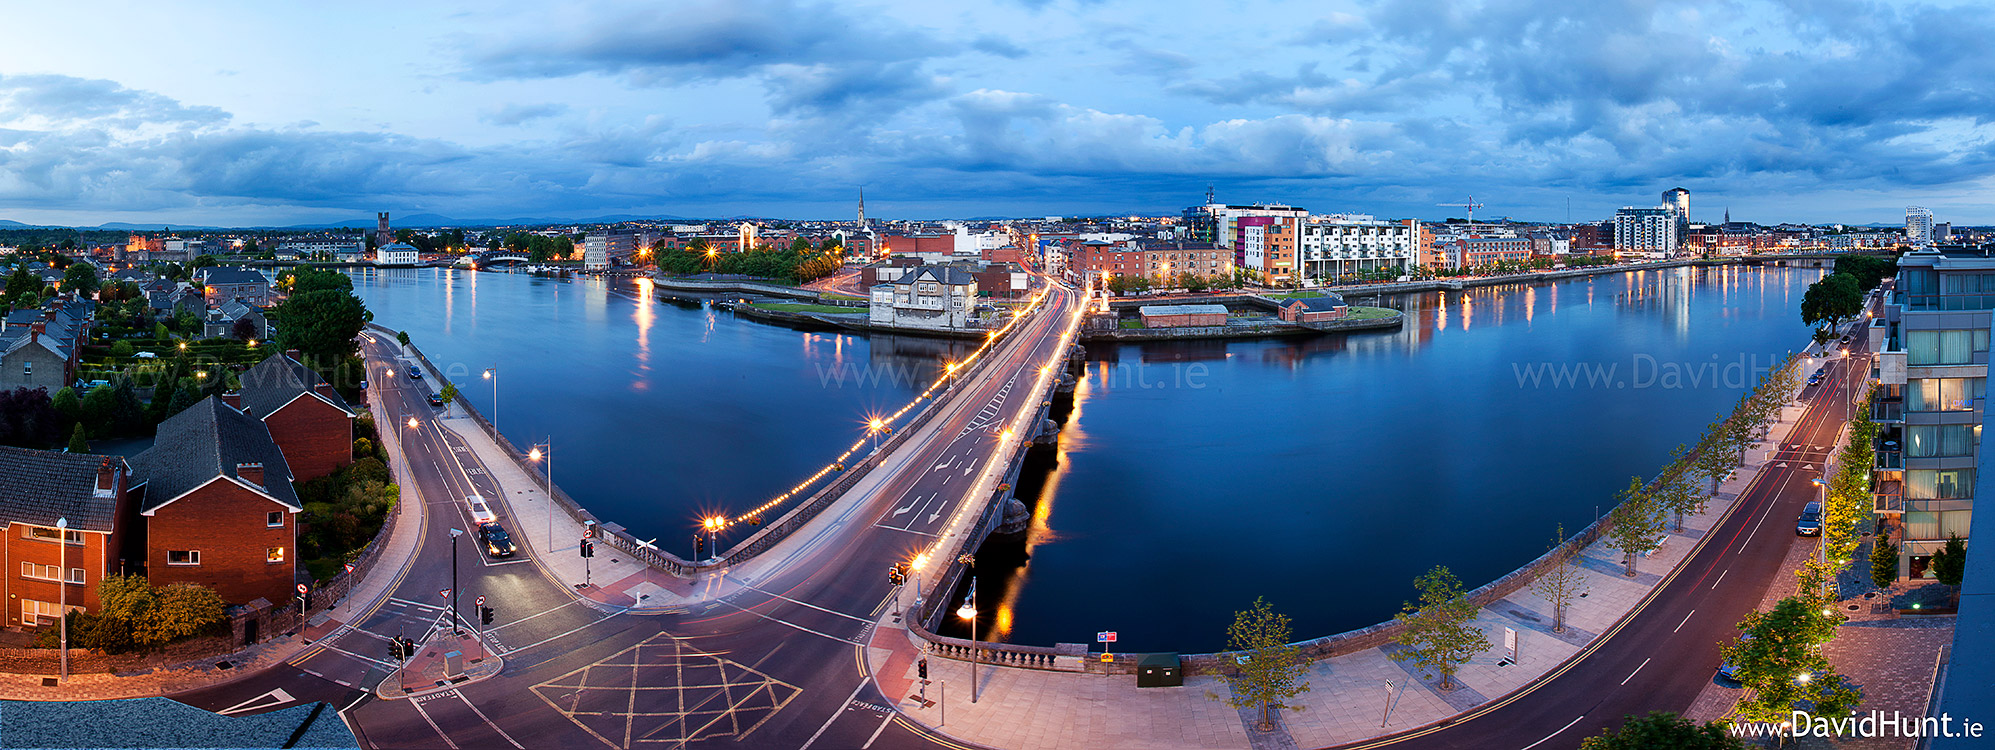
A while later, once the sun had gone down, we move to the other side of the building, and I set up my tripod on the very edge of the balcony, and took a series of five long-exposure images (about 15 seconds each). Stitched in PhotoshopCS5, and the GuyGowan retouch action applied (Yes, I subscribed to the website), plus a few more retouches from myself . I like to call this one “King John’s to the Clarion”, which covers about 800 years of Limerick history.  This is the result:

This is best viewed large.

Overall I think it was quite a productive evening. 🙂

Photoshop Extreme Makeovers

My daughter wanted to be an Avatar, because she happened to see a video on YouTube of Venessa Hudgens being given the Avatar treatment. I had a good look at the video, and gave it a go. Here’s the result:

Also, if you want to give it a go yourself, here’s the YouTube video by NEATeyePHOTOart I used as a guide:

Once I’d completed the Avatar daugher, my other two wanted their own makeovers. So they chose the vampire style of the movie “Twilight”. Here’s the before-and-after from each of their makeovers.

and

The most difficult part of the vampire makeovers was the removal of the freckles in the first one. I was told that vampires dont have freckles. Something do do with skin pigment in vampires. Where they got that from, I don’t know. Anyway, they were insistent that I take out the freckles. I think they were right, it’s a better result because of it.

L.I.P.F. Distinction

In April 2010, I was successful in my application of a Licenciate distinction of the Irish Photographic Federation. These distinction sittings are held twice a year by the IPF, and amateur photographers from all over the country submit panels for judging.
There are three levels:

  • Licentiate (10 images)
  • Associate (15 images)
  • Fellow (20 images)

Here’s my panel:

LIPF Panel

The process of putting the panel together is roughly as follows. The images first have to be selected. I got the help of several club members with this. We put 30 to 40 5×7 images on a large table and narrowed it down to about 15 images, then narrowed it down further to 10-11. Some images had to be flipped horizontally to make them more suitable for the panel, as the images should work together to compliment each other.
Once the final 10 images were selected, each image had to be processed, printed, and mounted. They were printed using my calibrated Epson R2880 printer. Then they were mounted. For this I used black-core mount board, and Neville Gawley was good enough to cut the mounts for me. Once the images were mounted, they were glued onto 5mm foam-core board using 3M spray-mount adhesive. This gives the  finished images strength, and are less likely to warp. The thicker the foam-core, the less warping.
The day was very interesting, as there were about 50 photographers who had submitted panels, and it was great to see some wonderful work on display. Usually the distinction judging is held on the same weekend as the IPF National Club Competion, which are also on display throughout the day. Even of you don’t have a panel entered, it’s still worth a look.

Adobe Photoshop CS5 Arrival

I just took delivery of Adobe Photoshop CS5. I had recently got CS4, and decided that I’d like to keep up-to-date with the latest version, especially with all the rave reviews of the new “Content-Aware Fill” feature that everybody is going on about. Having played with it in the trial version, I decided it was worth the upgrade. I haven’t tried it for real yet, only on some test images, but the results of the Content-Aware Fill look nothing short of magic. I was working on an image of the Dolmen in Poulnabrone, and used this feature to remove those damn ropes that surround it. Not only did it do a nice job of removing the ropes and rope-stands, it filled in what it removed with rocks, shadows, highlights, etc, which all made for a retouch that is very hard to tell from the real thing. Much better (and faster) than the older patch tool in CS4.