 I recently had the need to have a doorbell at the entrance to my property, having recently put in automated gates. I could have run a cable, but I wanted to try out some new 433 MHz transceivers I recently purchased. The entrance would have a push-button switch and the house would have a receiver accepting packets from the entrance. Once it got a packet, it would trigger a relay to ring the doorbell. The doorbell was an old model, driven by 12V AC, so I thought a relay would be the handiest way to triggger it’s chime. Also, attached to the internal Arduino would be the old doorbell, connected to a gpio input which could also trigger the relay, activating the doorbell. Two methods to chime the same doorbell.
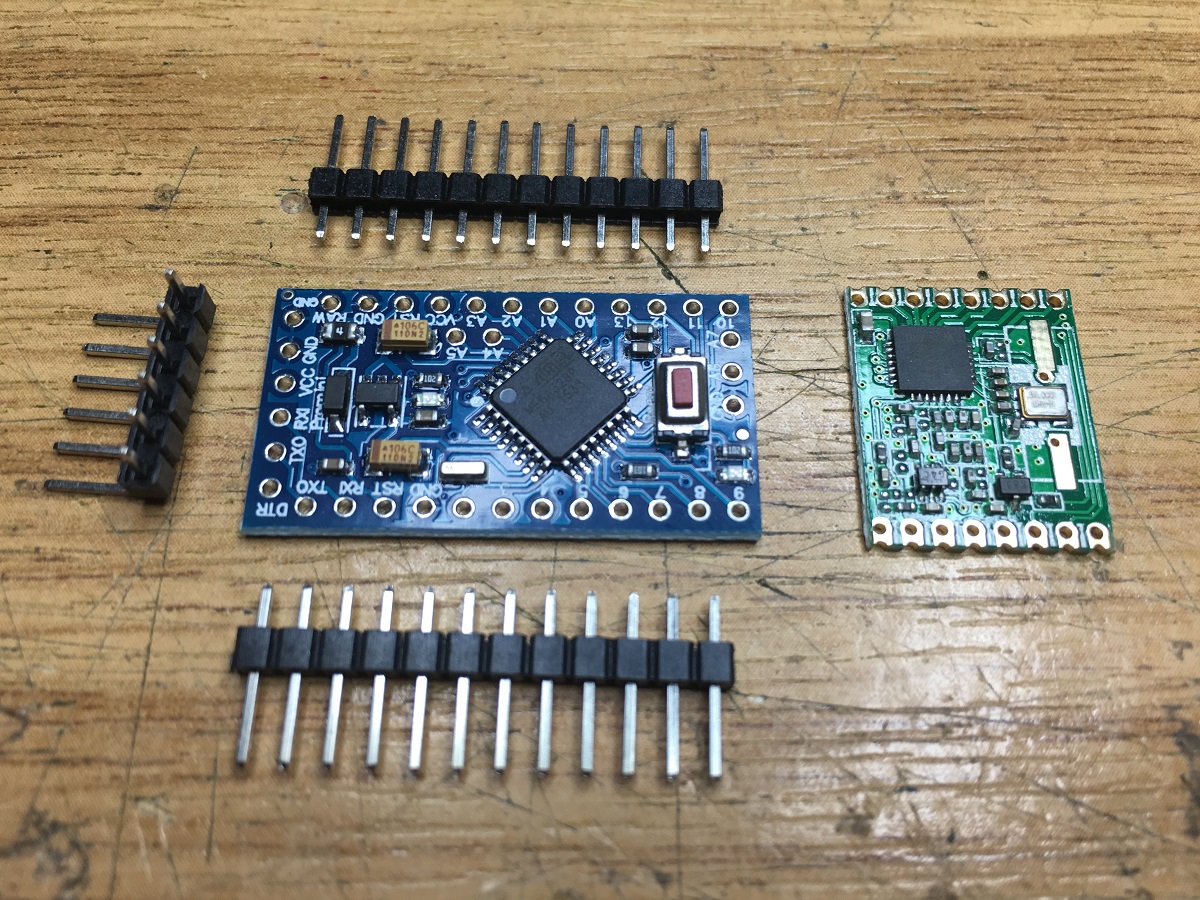
Here’s the two main pieces of hardware I used for the project, an Arduino Pro Mini and an RFM69HW, as well as a couple of pieces of wire for antennas, and a Relay board to trigger the doorbell. I had to use the small boards, as I was fitting everything inside the chime casing on the house side, and inside the gate controller box at the property entrance.
The programming is all done with the Arduino IDE, and there’s some very fine examples with the RFM69 library. The one that was closest to my use case was RxTxBlinky, which sends an encrypted packed from one transceiver to the other when a button is pressed. Almost exactly what I needed. The Pro Minis I have don’t have USB connectivity, I needed an FTDI to USB cable, which I happened to have:
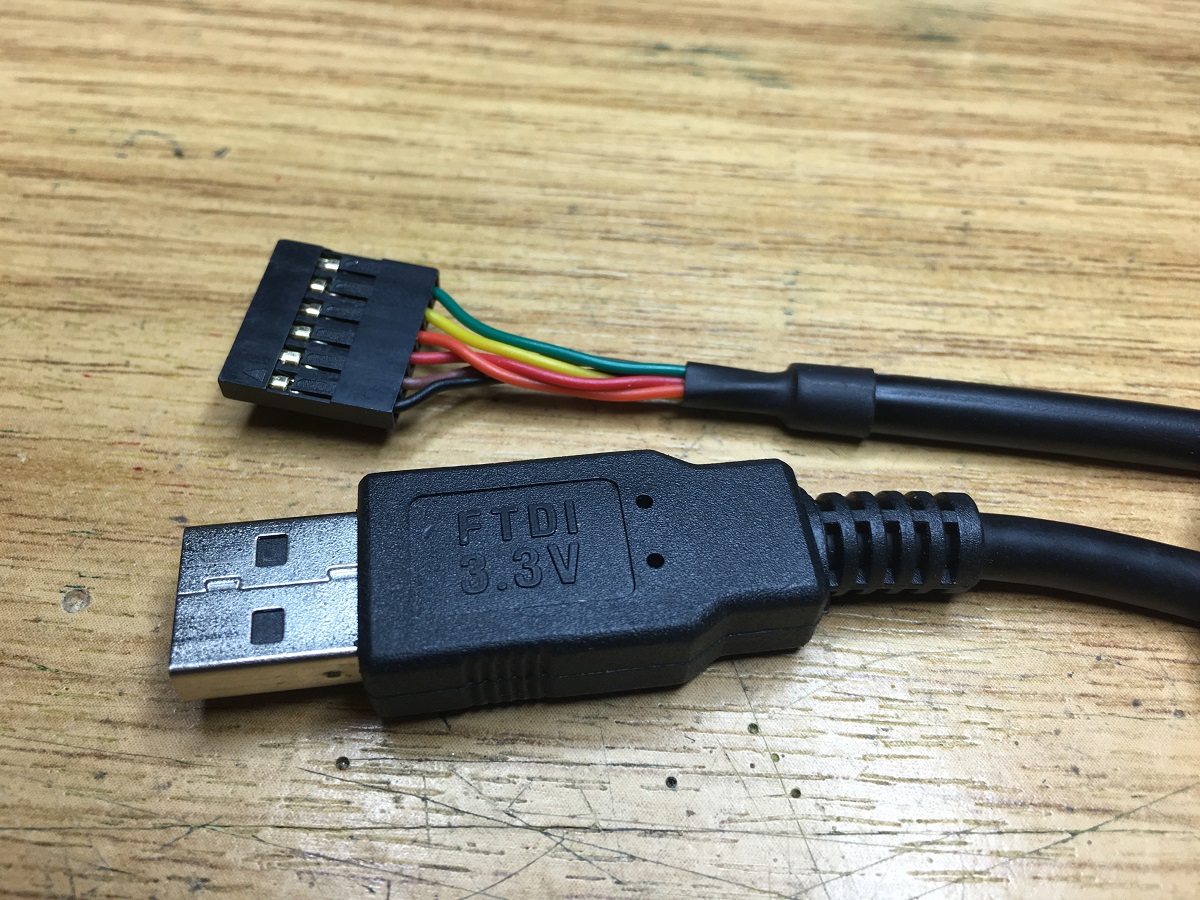
Connecting the Pro Mini to my PC was then a simple case of soldering on the FTDI header.
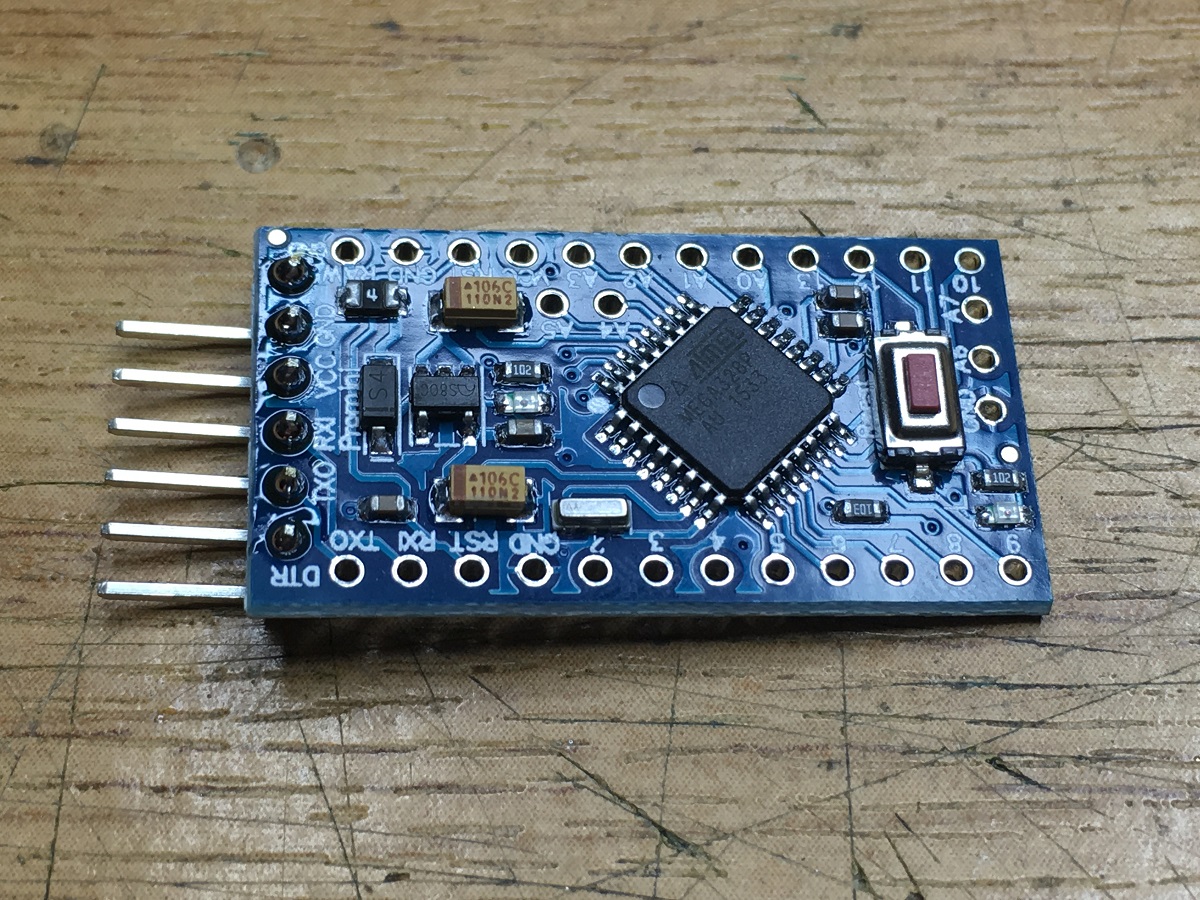
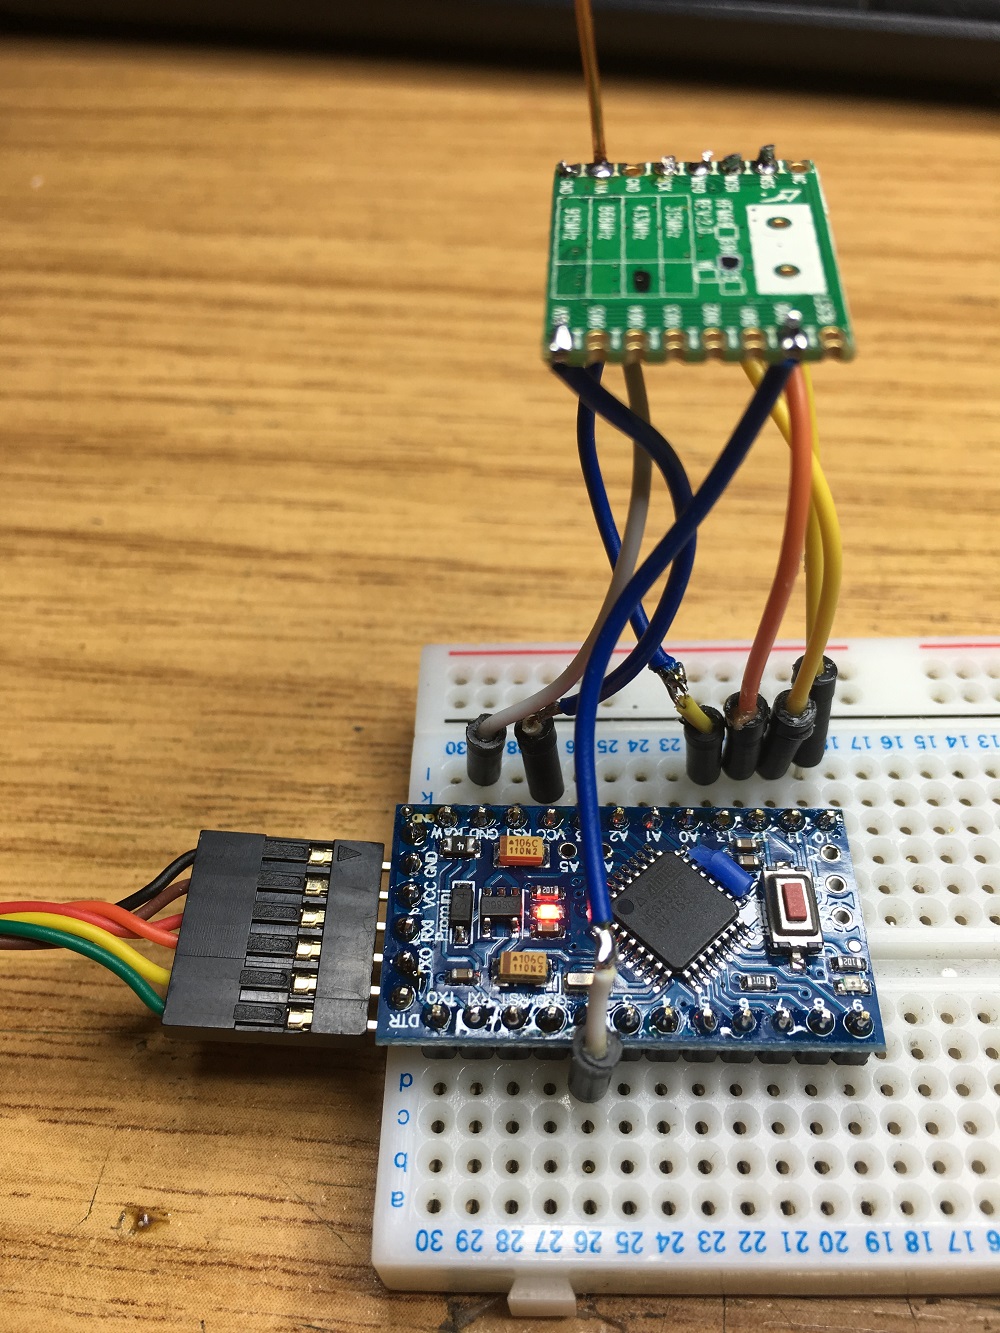
The following picture shows the Pro Mini connected via FTDI cable to the PC, and the RFM69 connected to the SPI bus, as well as the Interrupt pin and power. If you’re interested in trying out the RFM69’s yourself, then have a look first at the excellent “Introduction to the RFM69HW Transceiver” at AllAboutCircuits.com . It has some great diagrams for wiring, the same ones I used for the setup here.
So, I set up a couple of transceivers, each with a ~16cm piece of wire hanging off the antenna pin. I got good range with a 15.8cm, other sources say 17cm is better for 433MHz, but I didn’t spend much time tuning. Running the same sketch on each Arduino, I was then able to see packets being sent from one transceiver to the other.
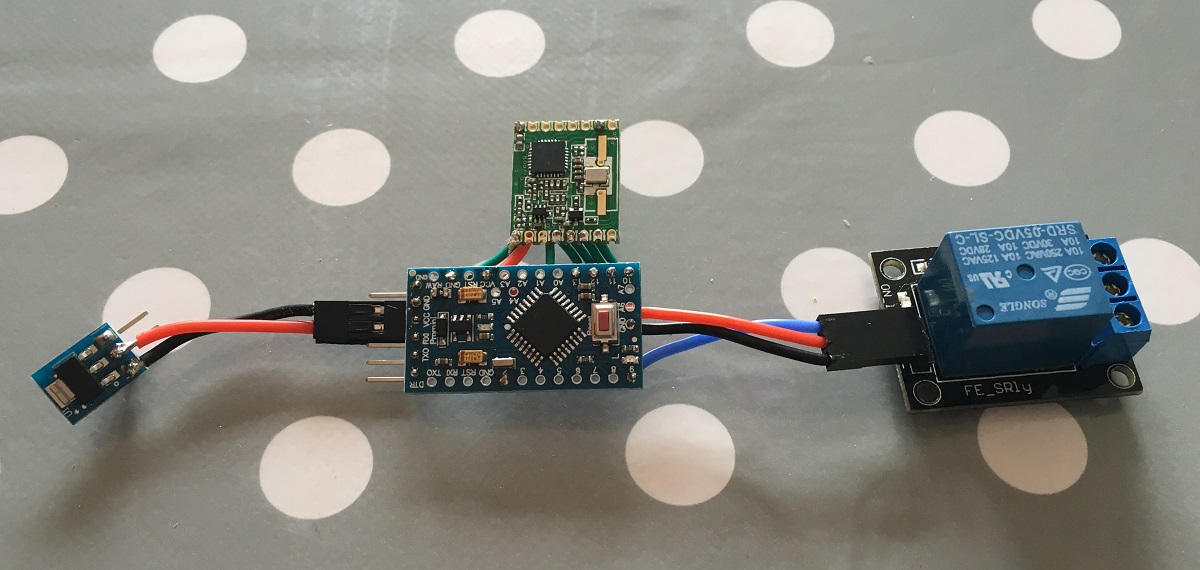
Once I had that much working, I needed to work out how to switch on the 12V AC needed for the doorbell. I had some relay boards suitable for Arduino lying around, so I tried out one at 3.3v, and it switched on and off fine. Using this I was able to switch on the 12V AC to the doorbell for a second to allow it to chime. Here’s a pic of the circuit with the relay.
The small board on the left is a 5v to 3.3v converter. I have 5V available at the gates, but the RFM69 is 3.3v only, and cannot be used at 5V, so everything had to work at 3.3v, Arduino, Relay, etc. Also, you can see the relay is activated by pin 9 of the Pro Mini. This was the only modification I had to make to the sketch – bring pin 9 low for a second when it got a valid message, thereby enabling the relay, and chiming the doorbell.
Here’s an image of the contents of the doorbell enclosure. Messy enough, I’ll probably tidy it up later. Everything fits when I put the case on, and the chimes (black metal bars on either side) are clear of any obstruction so chime cleanly when hit by the solenoid (centre of image). The wire antenna also fits nicely inside the enclosure, that’s one of the reasons that the RFM69 is mounted so low down, so that the antenna will fit.

At the gate end of the system, instead of a small tactile switch I used for prototyping, I used a more traditional weather-proof switch mounted beside the gates, feeding into pin 3 on the Pro Mini. Pressing this causes a packet to be sent to the house, triggering the doorbell. All in all I’m very pleased with the day’s work. It’s about 50 metres range, and works perfectly. With better tuning of the antennae, the range would be a lot farther. Visitors can now request the gates to be opened via doorbell. 🙂 I might add an intercom in the future, maybe with a camera. Intel Realsense with Facial recognition, maybe? 🙂