Here’s the first in a series of posts on my Open Source Hardware project, entitled OpenLapse, which is a rail system for timelapse photography, including everything from the electronics, software, and physical hardware designs. It’s an evolution of a previous project, the Raspberry Pi based Timelaspe Rail, but this is designed to be simpler to build and use. A web interface is presented from the controller which generates a WiFi hotspot, and the user can chance the parameters for the timelapse, as well as manually control the motors on the rail.
This is all a work in progress, and I hope people will get involved in submitting their own modifications and improvements as time goes on.
And I’ve a new video with a quick overview of the changes on YouTube:
This post focuses on the brains of the system, the controller hardware, which consists of a custom PCB plus a few standard components that are easily available via the websites below. The main components the WeMos D1 Mini MCU and the WeMos Motor controller board, plus a custom board for driving the camera an tying it all together in a neat form factor that can be easily mounted on your timelapse rail dolly.
Custom PCB
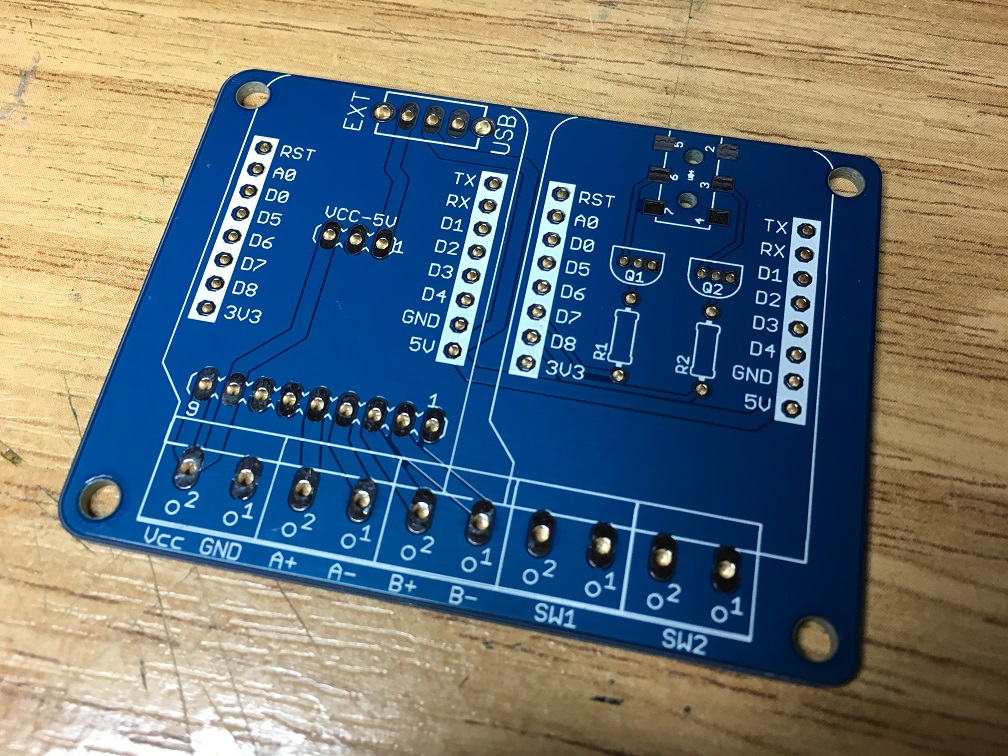
I’ve made the custom PCB available to order from OSHPark. The list of components is in a following section. You can order the PCB here. You’ll get 3 copies of the board for about $22, with free worldwide shipping.
![]()
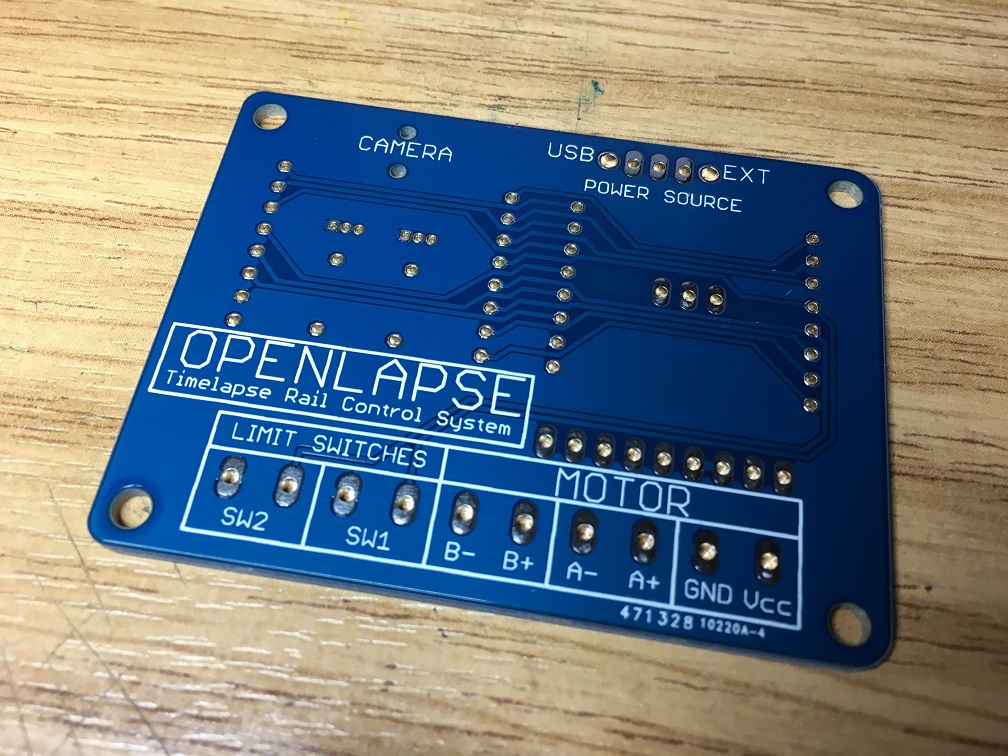
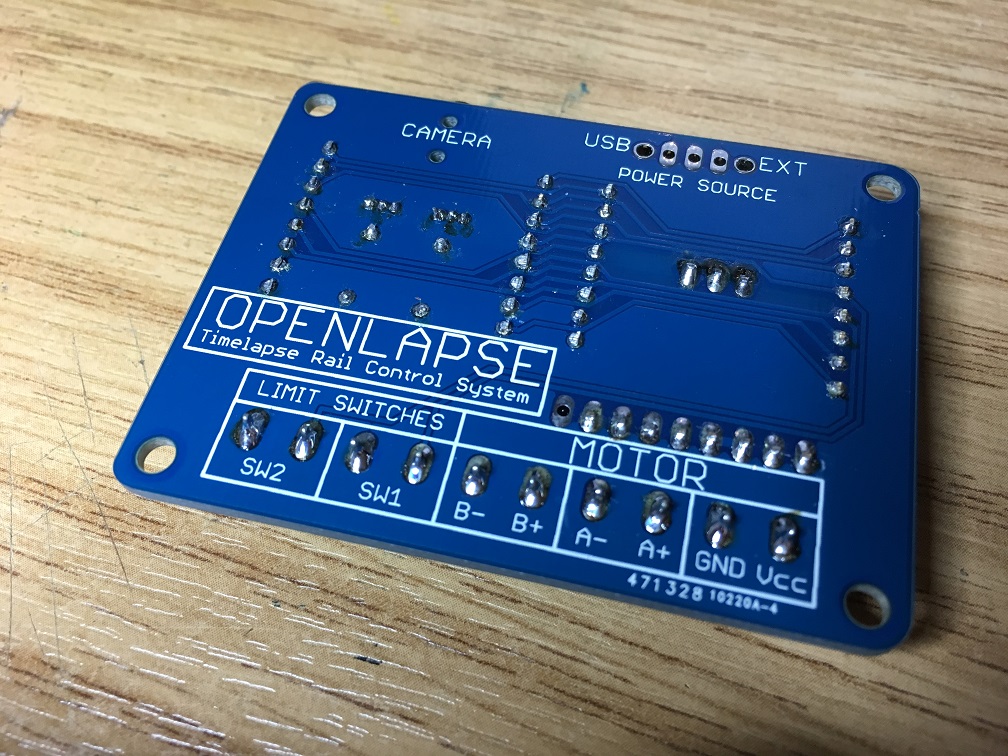
Here’s a couple of pictures of the same board made by Seeed Studios in China.
And the bottom, with the OpenLapse name 🙂
Components
So, once you’ve got your hands on the PCB, you’ll need a few components to go along with that.
| Component | Quantity | Source 1 | Source 2 |
| DC-DC converter | 1 | Adafruit | eBay |
| 2k2 Resistor | 2 | Adafruit | AliExpress |
| NPN Transistor | 2 | Adafruit | AliExpress |
| 8-way pin header | 2 | AliExpress | |
| Screw Terminals (2 way) | 5 | AliExpress | |
| 2.5mm Stereo Socket | 2 | AliExpress | |
| Wemos D1 Mini Pro | 1 | AliExpress | |
| WeMos Motor Controller | 1 | AliExpress |
The entire shopping list for the controller should come to about $50 (including shipping via snail mail). You can shop around and get stuff closer to home, which may increase (or decrease) the price, but may get it to you quicker. Snail mail for some items may take a month or more, whereas a courier will get to you in a few days, but will cost a lot more. And bear in mind that each item on the list above may come from a different supplier so you’ll pay shipping for each item (unless it’s a free shipping item).
Shutter Release Cable
To connect your camera to the controller, there are a selection of cables available. You’re looking for one with a 2.5mm stereo jack on one end, and a connector suitable for your camera on the other end. For Canon DSLRs, see the link here. There should be similar cables available for other makes of camera.
Assembly
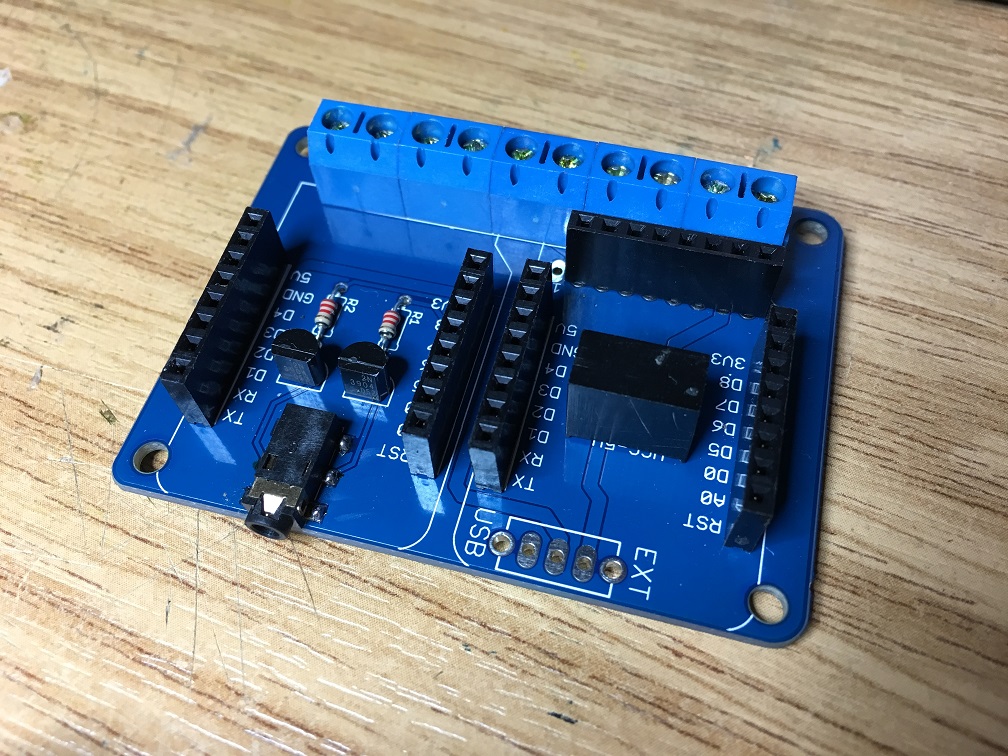
The board is designed in a way to be very easy to solder. Mostly through-hole components, and the one surface mount has nice big pads (the 2.5mm stereo jack socket). The following pictures shows an almost fully assembled board.
And all the components. Make sure the DC-DC is the correct way around. The Vcc side on the silkscreen is for the input, and the 5V is for the 5V output. The only missing component is the switch for when the USB cable is inserted, I’m waiting on some of those to come from China.
Here’s a video of the board construction:
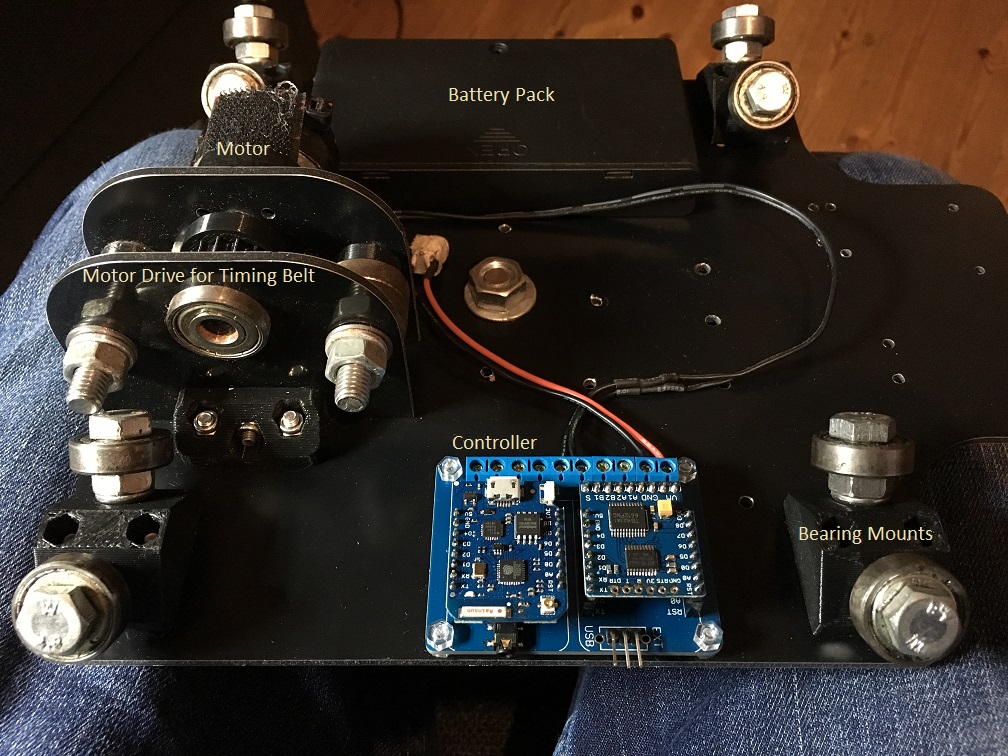
And here’s the completed controller mounted on my rail dolly.
along with a video of the construction:
The software is posted on GitHub. You can subscribe to the blog so as not to miss any updates!
Hi David
Always lived the projects you’ve done and did make a start on the original pi based time lapse rig but my mechanical skills are too poor to get anywhere. This new version will appeal if you take a similar approach to the hardware, by which I mean, the rails and trolley, etc. Electronics I have no problem with but I can’t saw straight for toffee!!
Cheers
Texy
Yup, over the coming weeks, I’ll be putting up CNC drawings of the parts that need to be made (not many), and an order list of parts that can be bought off sites like AliExpress, eBay, etc. It’s meant to be and open timelapse system, hence the name ‘openlapse’ 🙂
One 3D printed part is already on github, a part to hold the bearings for the dolly to sit on the rails: https://github.com/climberhunt/openlapse/blob/43d62138ec194c741f46a52193e1db362c31b7d6/models/BearingMount.stl
Hi Dave,
Just ordered a set of boards and I’m looking forward to test out the new system.
I already played around with your previous setup and made at that time an hotspot phone connection with a bash script. https://youtu.be/8AvPPpt5oU8
I will again implement the hardware for a monorail configuration to make it handy to transport.
Hopefully some more news soon!
Thanks for sharing your brilliant ideas.
P
Hi Dave
The link for the Wemos D1 Mini Pro goes to a battery charger board….
Texy
Thanks. Fixed.