 Here’s a few 3D models of the time-lapse rail I’ve been working on. I’ve put a good bit of time into the models, as I feel it’s a good way of showing how the construction is done for the various parts of the rail. The last model is of the complete rail. I still have a few parts to add, like the Tripod Head and WiFi Antenna, but they do demonstrate the construction nicely.
See the Github repo for models, electronics designs, laser cutting info, software, etc. I’m adding more and more to that as I get the time. In the near future there should be enough info for people to easily build their own rails. And there are other posts in this blog showing more. Be sure to check them out.
When you’re viewing the models, be sure to go fullscreen. 🙂
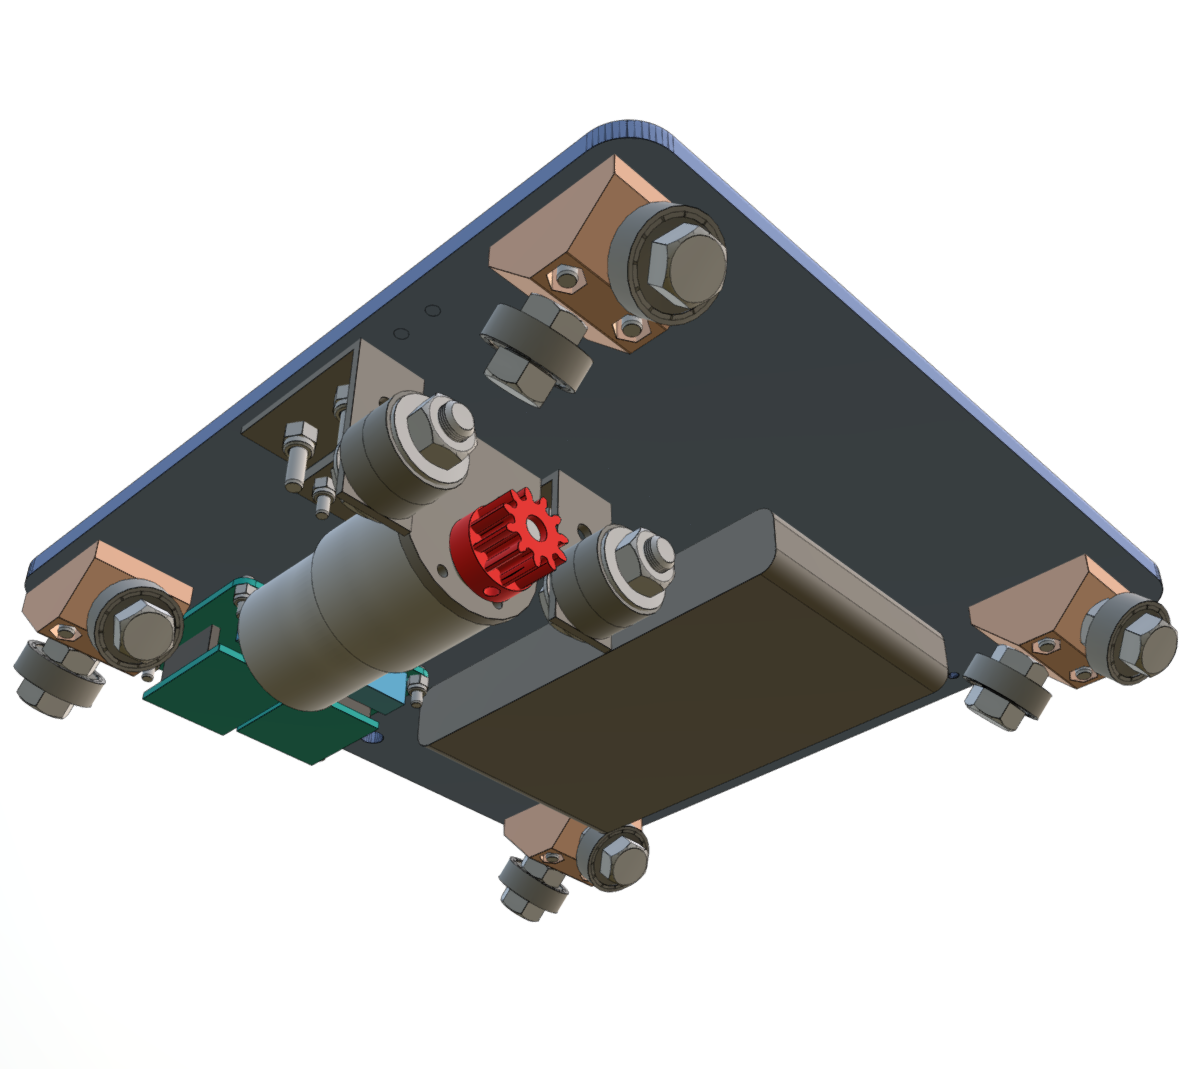
Dolly
[sketchfab id=”8e31b8654720414badb8bb2adb2e6cef” start=”0″ spin=”” controls=”0″]
Tube Clamps
[sketchfab id=”1d3348fe03ea4c32873af1b296b4c84e” start=”0″ spin=”” controls=”0″]
Complete Rail
[sketchfab id=”d83e4e076fef40fd8f9e545ac040c7b3″ start=”0″ spin=”” controls=”0″]
A note on the embedded 3D models in the blog:
I use SketchUp to design the models. I initially uploaded the models to GitHub directly, but the rendering is in one colour, and the models are limited to 25MB. Not really suitable for my full rail model. I then was looking at WordPress plugins to display embedded 3D models, and looked for the one with the most downloads, and SketchFab was winning that race by a long-shot. So I then tried uploading a few stl files, but again, no colour or textures. With a bit more reading, I found a SketchUp plugin for SketchFab, so with a very quick “Upload to SketchFab” menu option in Sketchup, the model was processed, zipped and uploaded to SketchFab in one simple step. And the models retain all of their colours and textures of the model as I viewed it in Sketchup (for the most part). There are a few tiny niggles with some colours, but I’m working to fix those. The red components in the above renderings should be salmon, as I’m trying to keep the colours of the 3D printed parts consistent, and a blue colour for the laser-cut parts.
So the components are as follows:
- Sketchup for building the models
- SketchFab plugin for Sketchup for the uploading
- SketchFab website for the on-line storage of the models
- Sketchfab plugin for WordPress for the rendering
All-in-all it’s a pretty smooth workflow! 🙂
This could just be the excuse I’ve needed to purchase a 3D printer.
What’s the maximum dimensions of the largest part?
I’m looking at the Da Vinci Mini which has a maximum build
size of 5.9 x 5.9 x 5.9inches.
Texy
Nothing bigger than a couple of inches cubed. The plates are laser cut. I used 3mm dibond, but you could use 4mm or 5mm plywood.
3mm dibond. What makes up the sandwich? Most of what I see is aluminium clad, can the laser cutter you use cut metal? Source? Thanks.
Any reason why the plates couldn’t be 3D printed as well?
What are the dimensions?
Texy
Sure, I guess. 🙂
The dolly is 210mm x 220mm, so if you had a 9″ by 9″ capable printer, that would do the job. But it may be just quicker to cut a sheet of plywood and drill. 🙂