Raspberry Pi Zero with Pi Camera as USB Webcam

In my previous article, I described how to set up a Raspberry Pi High Quality camera as an IP camera, and use IP Camera Adapter to plug this into your favourite video conference software. Now, go one better, with just a singe USB cable and zero networking!

Continue reading “Raspberry Pi Zero with Pi Camera as USB Webcam”

Raspberry Pi High Quality Camera setup for low-latency Video Conferencing

The wonderful people at Raspberry Pi were good enough to send me their latest piece of hardware, the Raspberry Pi High Resolution Camera, plus a couple of lenses. As well as taking a few landscape shots and just generally playing about with it, the first real project was to set it up as a High Quality webcam for video conference meetings. Mainly because of the high quality sensor was bound to give better pictures than the small sensor webcams I have lying about, but also because there seems to be a shortage of decent WebCams available with all that’s going on in the world at the moment.

Continue reading “Raspberry Pi High Quality Camera setup for low-latency Video Conferencing”

4-20mA Level Sensor for Kerosene Tank

I’ve been using an ultrasonic sensor in my Kerosene Tank (Home Heating Oil) for a while now, but was not happy with the stability of the readings. Especially on relatively warm days, as the fumes in the tank seemed to confuse the readings. So I decided to try a different type of sensor, in the form of a 4-20mA Liquid Level sensor. This article shows the setup and compares to the ultrasonic sensor.


Continue reading “4-20mA Level Sensor for Kerosene Tank”

openlapse Time-Lapse Rail Interactive 3D Models

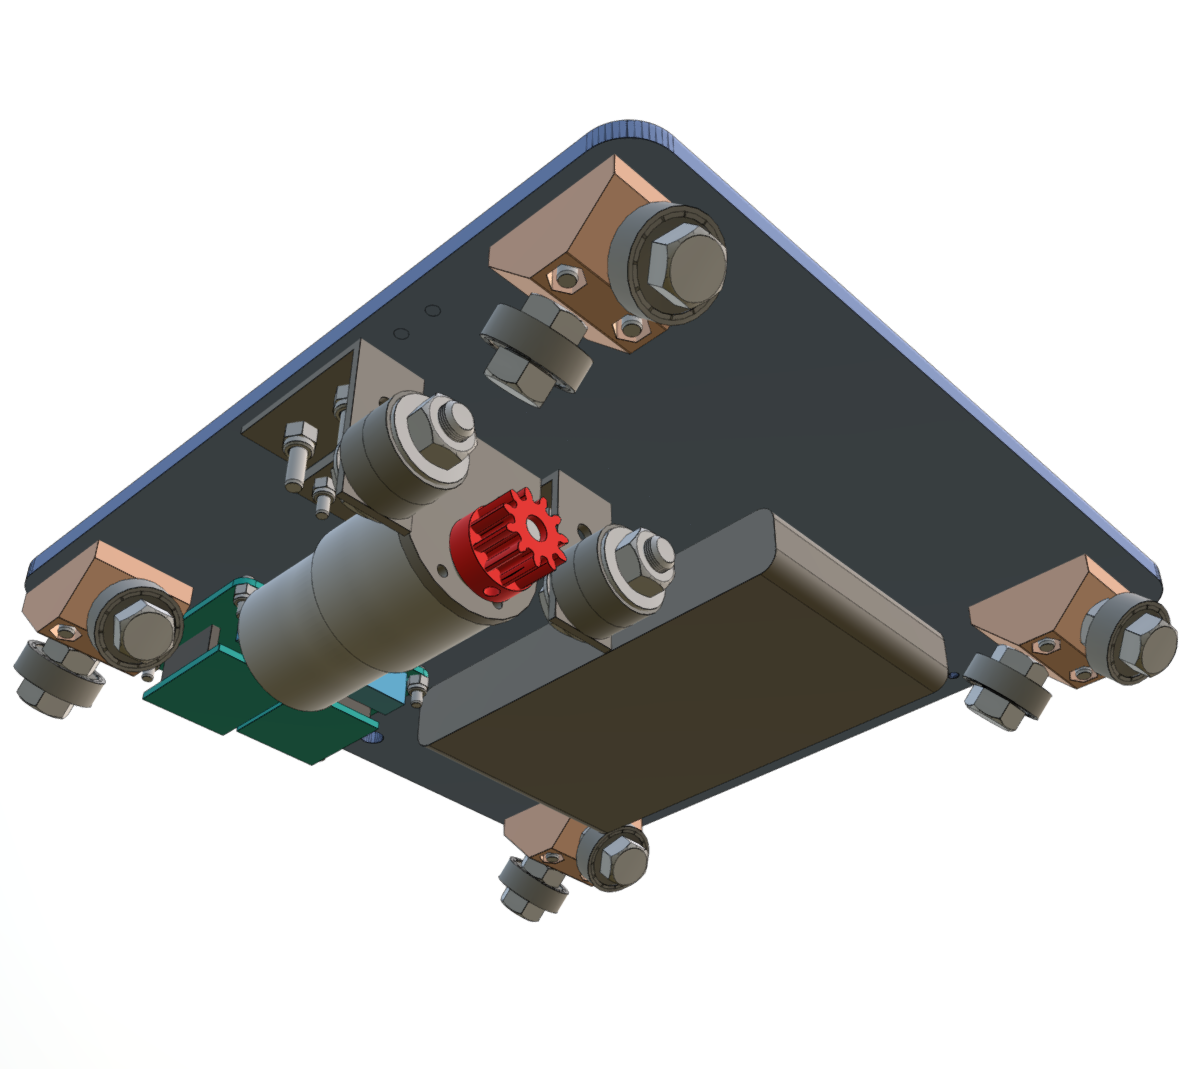
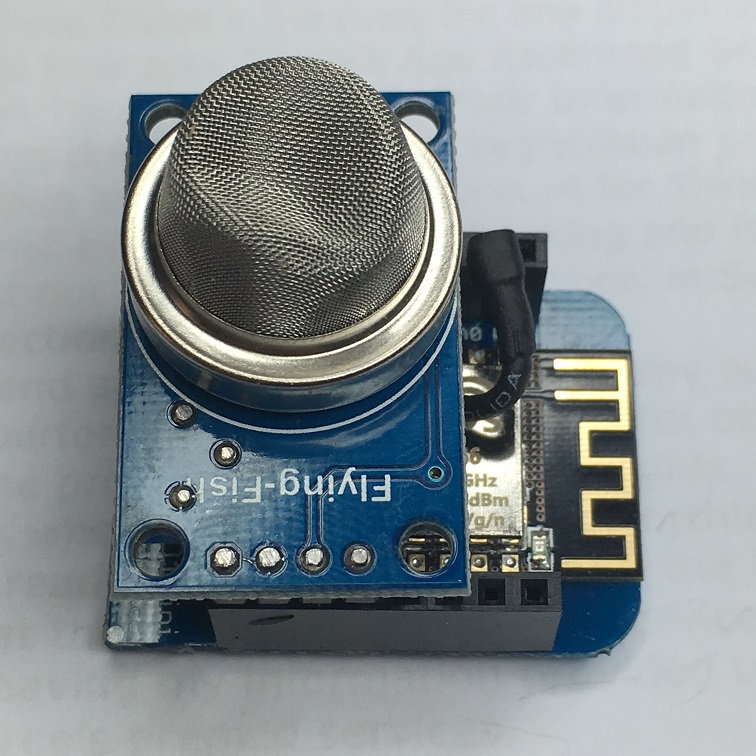
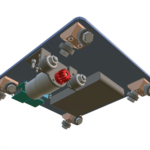
Here’s a few 3D models of the time-lapse rail I’ve been working on. I’ve put a good bit of time into the models, as I feel it’s a good way of showing how the construction is done for the various parts of the rail. The last model is of the complete rail. I still have a few parts to add, like the Tripod Head and WiFi Antenna, but they do demonstrate the construction nicely.

See the Github repo for models, electronics designs, laser cutting info, software, etc. I’m adding more and more to that as I get the time. In the near future there should be enough info for people to easily build their own rails. And there are other posts in this blog showing more. Be sure to check them out.

Continue reading “openlapse Time-Lapse Rail Interactive 3D Models”

Flashing the OpenLapse binary

In order to use the OpenLapse controller, it’s necessary to flash the firmware onto it. This article describes how to do that, and when you’re complete, you should be able to connect into the ‘openlapse’ WiFi hotspot with your smartphone and control your DSLR and motor. Even if you don’t have the additional hardware, you can still play with the user interface. I’d appreciate feedback. 🙂

Continue reading “Flashing the OpenLapse binary”

OpenLapse Timelapse Controller Parts and Assembly

Here’s the first in a series of posts on my Open Source Hardware project, entitled OpenLapse, which is a rail system for timelapse photography, including everything from the electronics, software, and physical hardware designs. It’s an evolution of a previous project, the Raspberry Pi based Timelaspe Rail, but this is designed to be simpler to build and use. A web interface is presented from the controller which generates a WiFi hotspot, and the user can chance the parameters for the timelapse, as well as manually control the motors on the rail.

Continue reading “OpenLapse Timelapse Controller Parts and Assembly”