The wonderful people at Raspberry Pi were good enough to send me their latest piece of hardware, the Raspberry Pi High Resolution Camera, plus a couple of lenses. As well as taking a few landscape shots and just generally playing about with it, the first real project was to set it up as a High Quality webcam for video conference meetings. Mainly because of the high quality sensor was bound to give better pictures than the small sensor webcams I have lying about, but also because there seems to be a shortage of decent WebCams available with all that’s going on in the world at the moment.
So the plan was to use the Raspberry Pi with Camera as an IP camera, and feed the video across the network to a Window 10 PC, and somehow plug in the video feed to all the different video conferencing software that I use from day to day. And the following works for Zoom, soon to test Skype and Microsoft teams (will update this paragraph as I test them)
I started by playing with lots of different methods to get the Pi sending low latency video to my laptop from the Pi, including raspivid to cvlc, mjpeg_streamer, cvlc on its own, gstreamer, plus a couple of others that don’t come to mind. Now they all work in their own, way, but the biggest problem I found with all of those solutions was the lag between me making a move, and the resulting video appearing on the screen. Most were about 1 second of lag, with some as bad as 2-3 seconds. Not good enough for video conferencing.
But the best solution I found was using User space Video 4 Linux (uv4l), which includes a nifty framework that can serve out mjpeg or h264 streams to remote clients really quickly. The lag is only about 100mS, which is amazing considering all that’s going on. I did have to make a few tweaks to save on bandwidth, the default settings for full HD was using about 250mbps, but you can get quite an acceptable picture for 1/10 of that if you set your compression correctly in the uv4l config file.
So, installation first. I started with a fresh install of Raspbian Buster (the full version from 13th Feb 2020) on a shiny new Raspberry Pi 4. Once booted, guided by hte Pi Setup Wizard I did the usual required setup, software updates, etc.
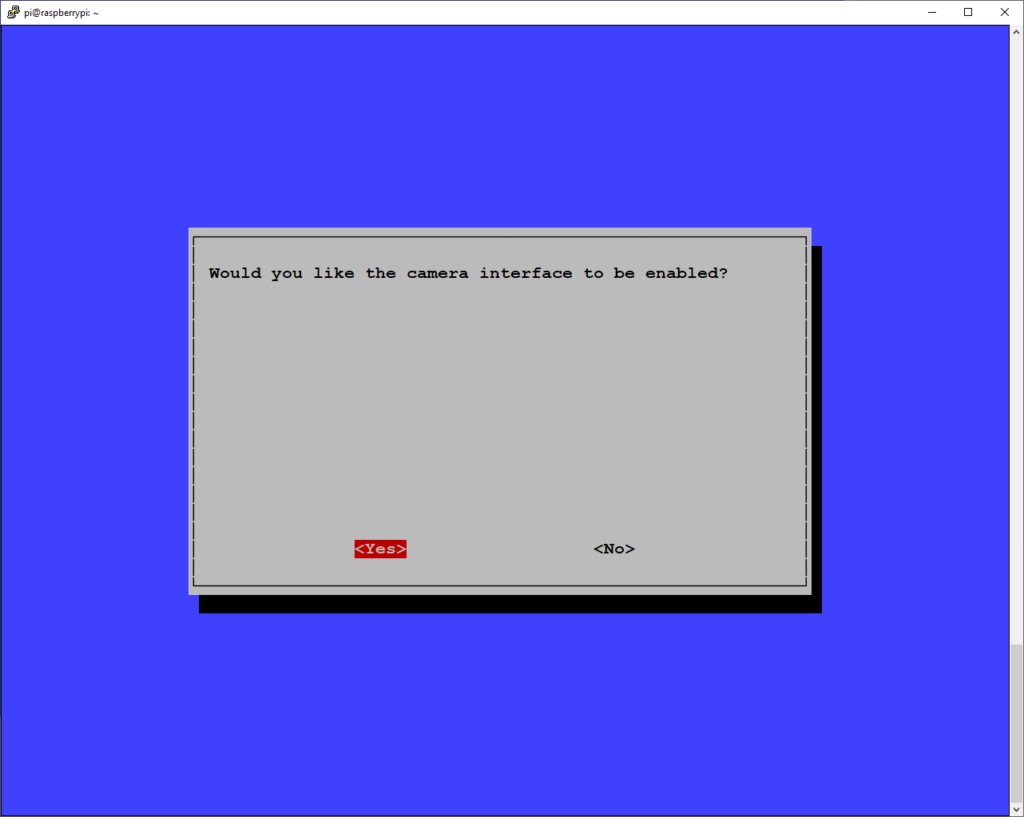
Once the software had set up, I ran “sudo raspi-config” to do a few key changes. The first is to enable the camera.
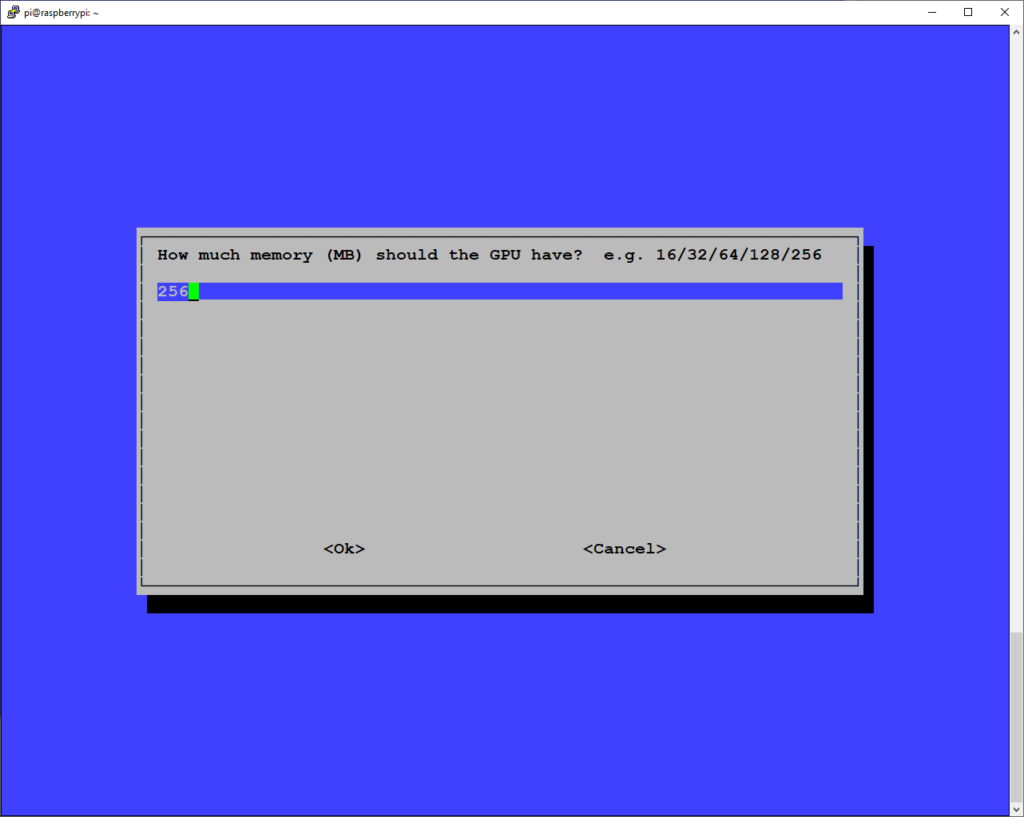
The second is to change the GPU CPU memory split. I found that when working at high resolutions of the new camera, the 128 MB isn’t quite enough for some tasks, I ran into some out-of-memory errors when taking 12 megapixel images, so I set it to 256.
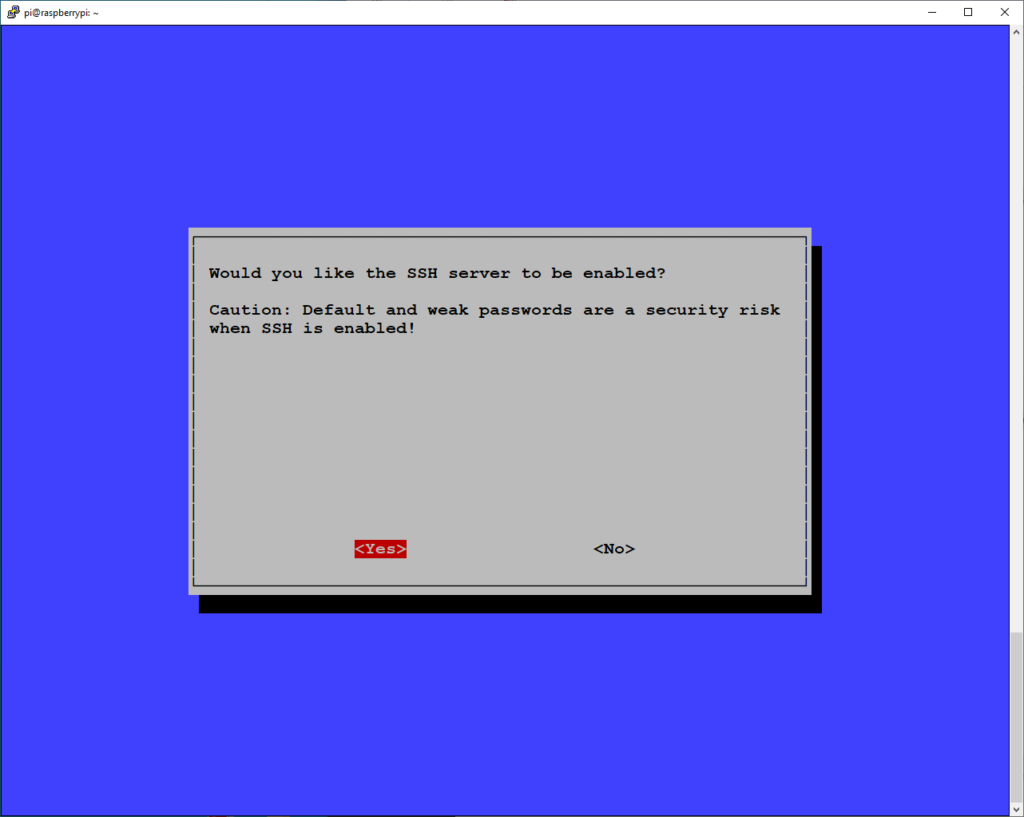
I also like to enable ssh:
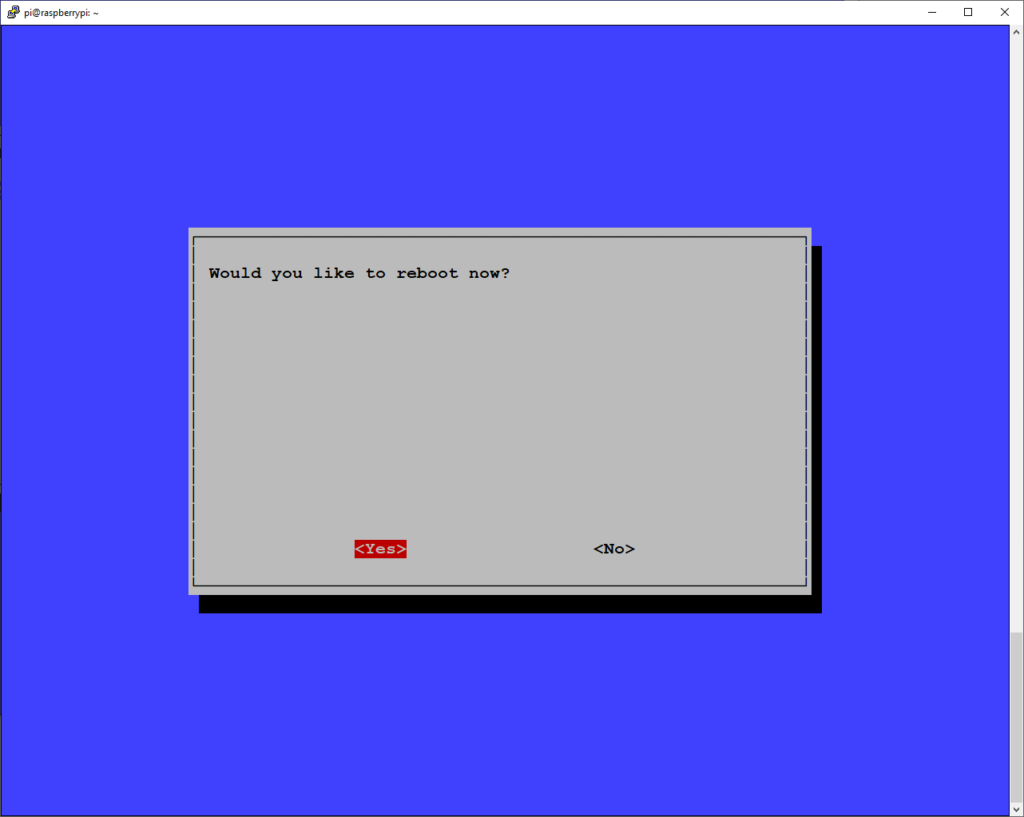
Then reboot to apply everything.
Once I’ve rebooted, a quick test of the camera with “raspivid -d”, and all seems to be working, I saw the camera preview on the Raspberry Pi monitor.
Next to get User space Video 4 Linux (uv4l). The official guide is here, but I’ve pulled out the relevant bits:
First we need to add a new apt-source:
$ curl https://www.linux-projects.org/listing/uv4l_repo/lpkey.asc | sudo apt-key add -
Then and add the following line to the file /etc/apt/sources.list:
deb https://www.linux-projects.org/listing/uv4l_repo/raspbian/stretch stretch main
Even though that mentions stretch, it works for buster. uv4l doesn’t yet have a repo for buster (at the time of writing)
$ sudo apt-get update
$ sudo apt-get install uv4l uv4l-raspicam uv4l-server
$ sudo apt-get install uv4l-raspicam-extras
The we reboot to allow the uv4l server to come up. If you have a monitor attached to your Pi, you may see the preview window on-screen.
Next, we need to tweak the uv4l-raspicam.conf file to chose the resolution and quality of our camera feed.
$ sudo vi /etc/uv4l/uv4l-raspicam.conf
I selected the following to change:
width = 1280
height = 720
framerate = 25
quality = 10
The quality defaults to 85, which gives a super picture, but very high bandwidth across the network. Adjust to whatever still looks good. 🙂
$ sudo service uv4l_raspicam restart
Followed by a check to see if it’s up and running OK:
$ sudo service uv4l_raspicam status

● uv4l_raspicam.service - UV4L Raspicam
Loaded: loaded (/etc/systemd/system/uv4l_raspicam.service; enabled; vendor preset: enabled)
Active: active (running) since Sun 2020-05-24 18:15:58 IST; 4s ago
Main PID: 1094 (uv4l)
Tasks: 16 (limit: 3607)
Memory: 129.2M
CGroup: /system.slice/uv4l_raspicam.service
└─1094 /usr/bin/uv4l -f -k --sched-fifo --mem-lock --config-file=/etc/uv4l/uv4l-raspic
And that should be it on the Pi side. We can check to see the feed, by opening a browser on a remote machine and browsing to http://<RaspberryPi>:8080/ and we should see the following use interface.
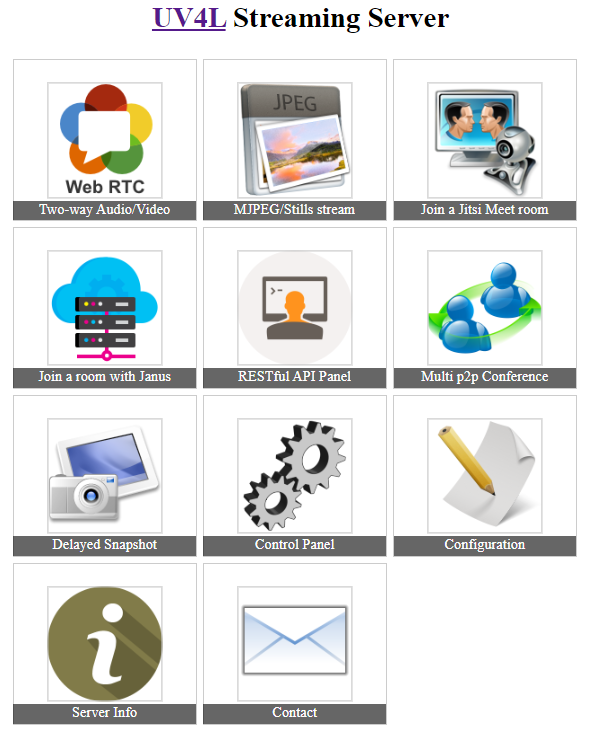
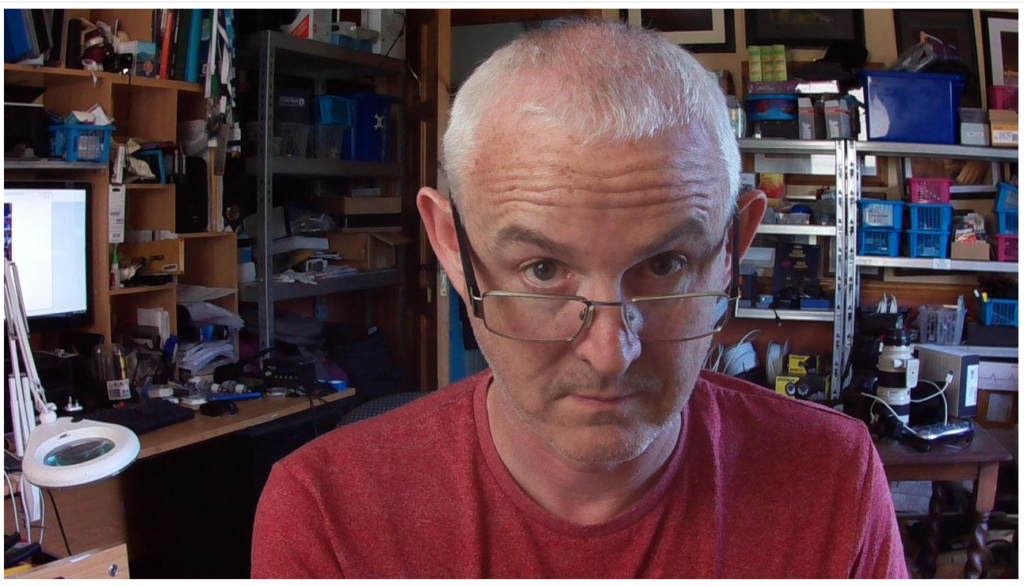
If you click on the “MJPEG/Stills stream” icon, you should see the feed. Here’s the awesome mug I was presented with 🙂
So that’s all of the Pi side done, next to get the MJPEG stream plugged into ZOOM on my Windows 10 PC. We use “IP Camera Adapter” which pulls in n MJPEG stream and presents it as a camera to windows. It’s a very small app, with a very simple interface. So grab it and install. Then you can run the “Configure IP Camera Adapter” from the windows menu, and you’re presented with the following screen:
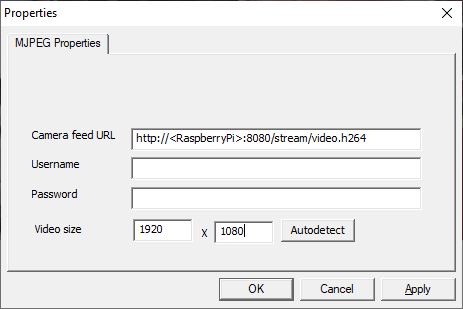
When you click on Autodetect, you should be presented with the following dialog:
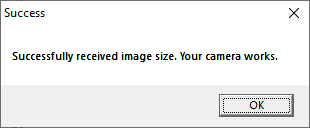
And it should detect the resolution of the source feed.
Once that’s done, next for Zoom (or whatever your favourite video conferencing software is).
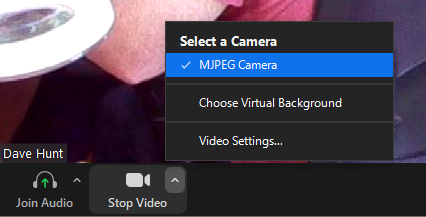
In Zoom, you just select the MJPEG Camera as your source, select your regular audio source, and you’re good to go.
There one remaining issue though, the MJPEG feed might look fantastic in a browser, but zoom seems to do some transcoding on the fly, reducing the frame rate and quality. I need to look a bit further into that.
So that’s the quick five minute (heh) guide to getting your Raspberry Pi High Quality Camera working as video conferencing camera with low latency.
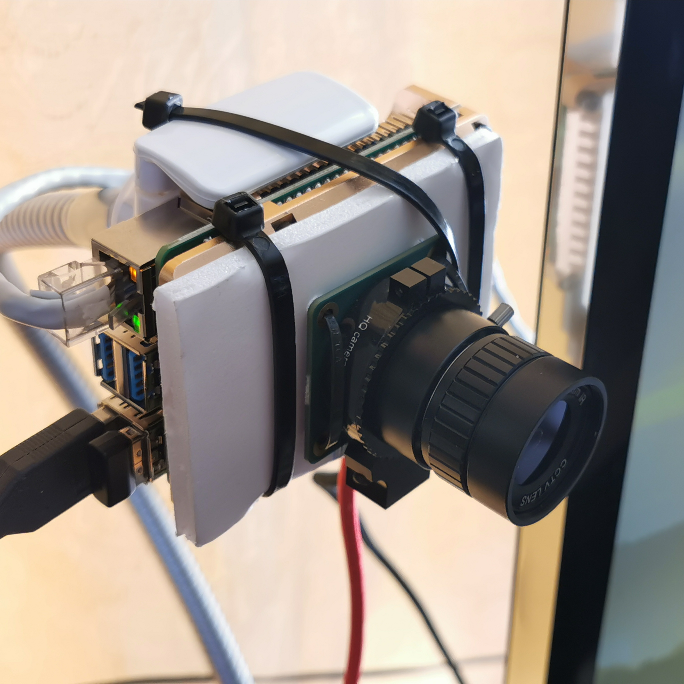
I love the fact that the lenses are manual aperture, I have difficult lighting conditions in my “office” where I’ll working from home for the next 6 months, so manual aperture really rocks. And the dynamic range of the sensor is MUCH better than the sensors you’ll find in the cheaper webcams (and even some expensive ones). Manual Focus is also great, set the focus on where you’re sitting, and don’t worry about it after that.
The camera I have in my setup is cable-tied to the Raspberry Pi 4 and attached to a flexible arm clamped to the desk, so I can position it easily at any angle.

Oh, and of course, the above should work with all the previous raspicam models, which are all pretty nifty in their own right, and should be more than good enough to use as webcams.
Thanks for reading. If you liked the article, give us a follow on Twitter, I’m @climberhunt there. Would love to hear from you! 🙂
David, big thanks for this awesome tutorial. Works ways better than other suggestions, especially those using ‘motion’.
I would like to add that you can switch to h264 in the user interface on the RasPi. For me it looks as if this gives a slightly better image quality and even cuts a bit off the latency which is already quite good with the default/mjpeg setting.
/me is just struggling with getting this stream into Open Broadcast Studio without having to use an additional browser window.
Cheers, Thorsten
Agreed, brilliant tutorial, answered a lot of questions I had and some I didn’t know I had yet. Very clear and straightforward, wish I’d found it sooner!
I’m also connecting in to OBS Studio, finding latency and quality is the same as a browser connection, about 1 second g2g latency using the browser source with the url I use in a browser – http://:8080/stream
Finally I get a clear picture of what should be done for my project. May I ask if size of RAM on Pi4b matter for streaming quality?
Daveh can you also suggest which lens you are using for the pi HQ cam?
“I found that when working at high resolutions of the new camera, the 128 MB isn’t quite enough for some tasks, I ran into some out-of-memory errors when taking 12 megapixel images, so I set it to 256.”
I’m using the 3MP 6mm lens.
Does not apply to uv4l streaming server, cause its max. streaming resolution is 1920×1080 only = your rendering is low anyway.
Very nice tutorial. I actually had to use https://www.linux-projects.org instead of just http://www.linux-projects.org. But then I worked perfectly.
Thanks, I’ve updated the post.