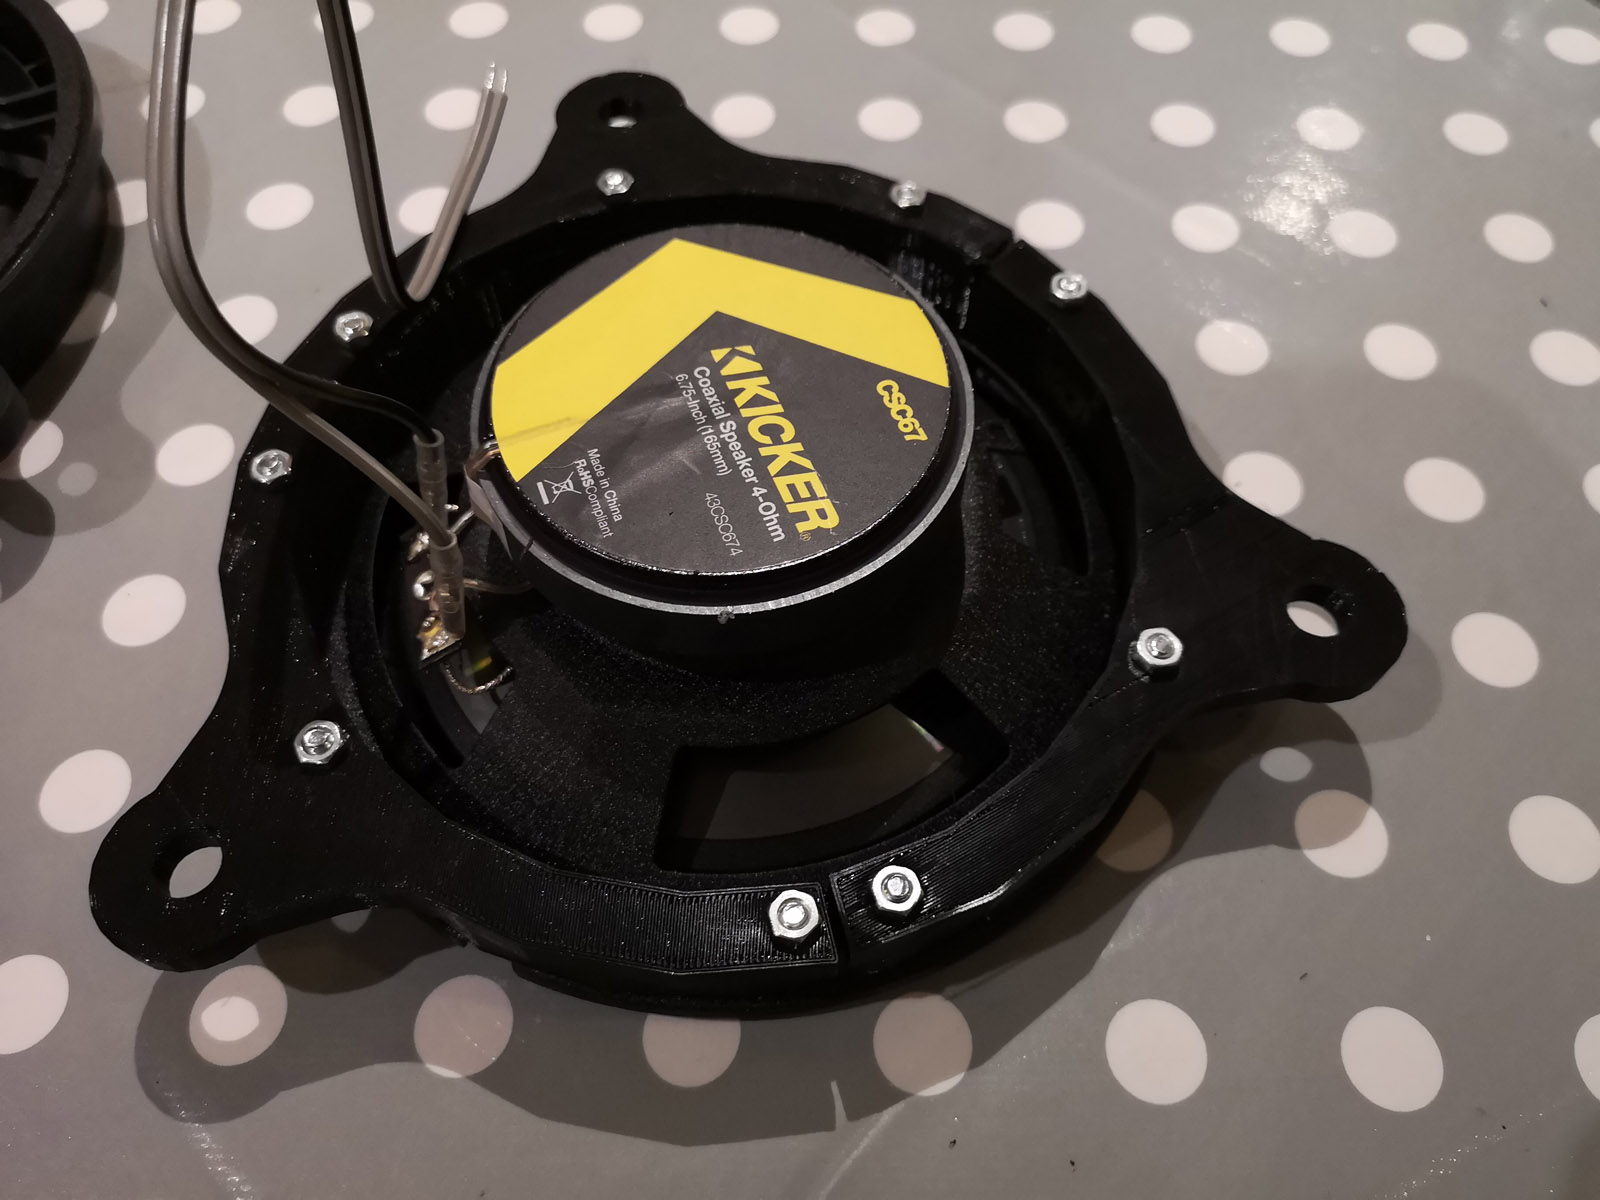
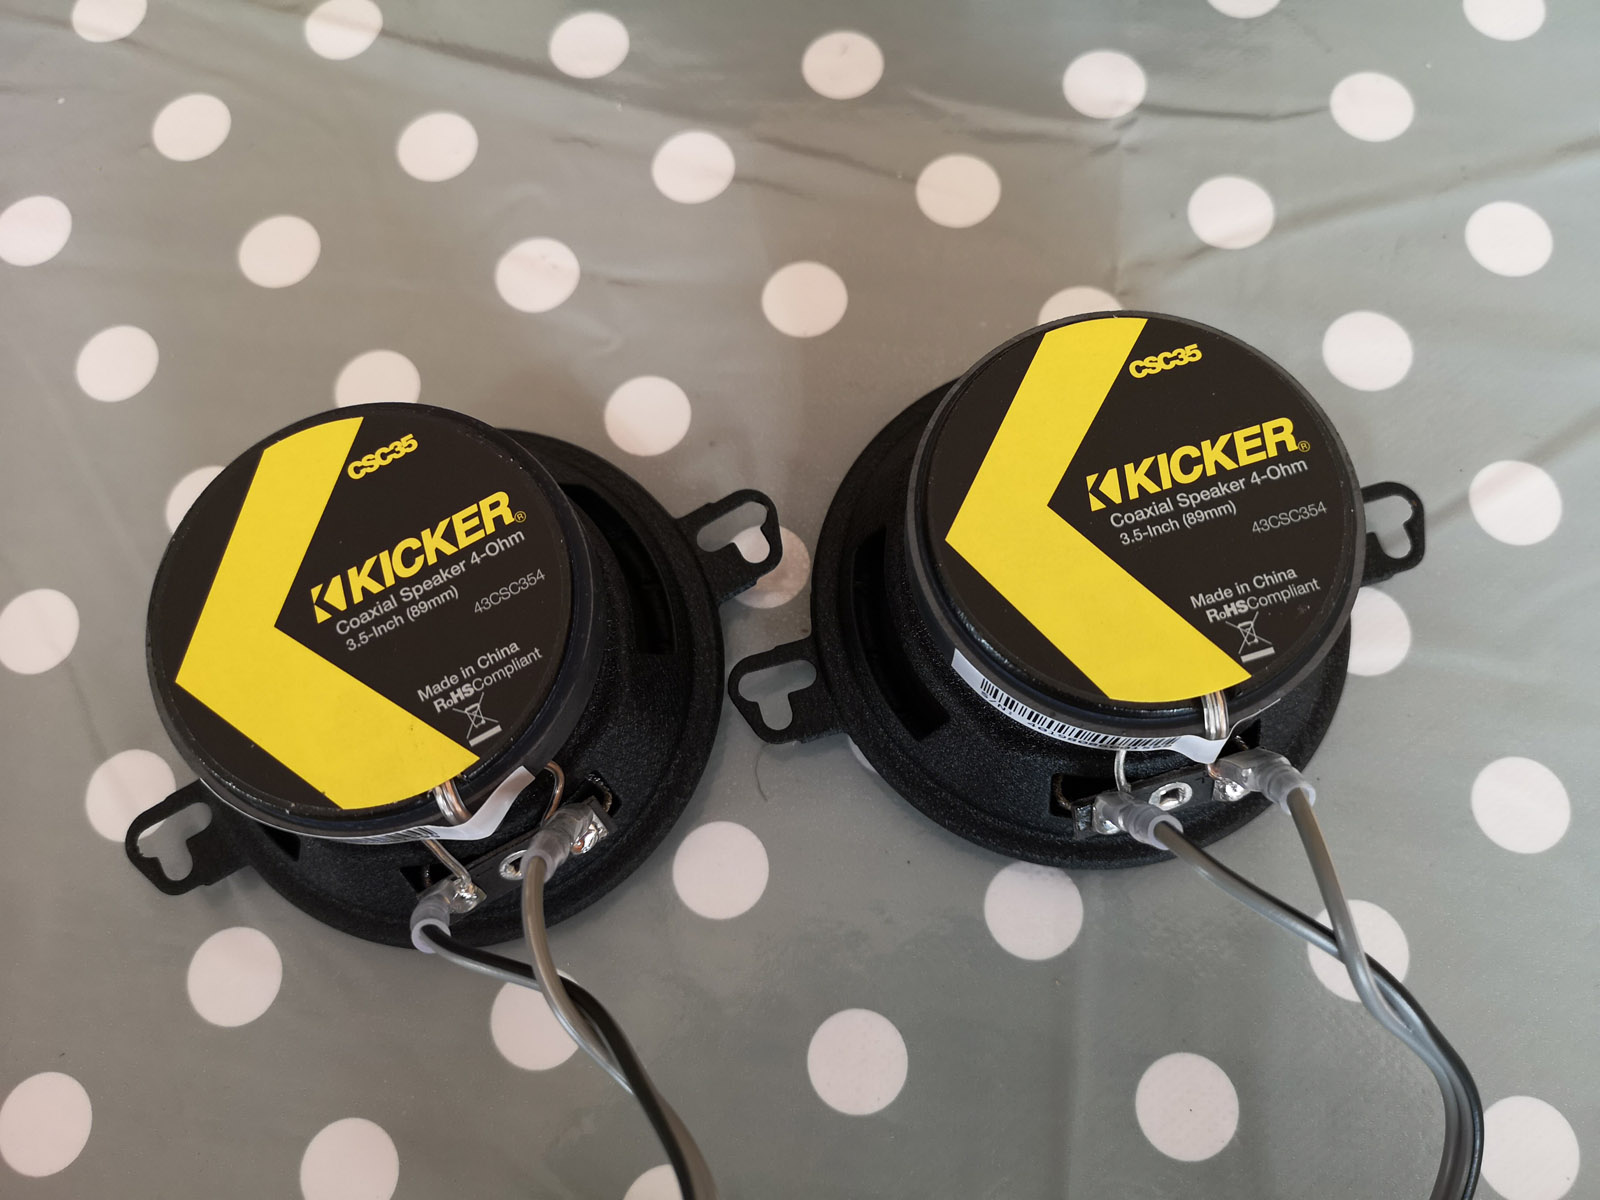
 Here’s Part Two in a series of articles where I upgrade my car’s audio system. See previous article here. This time we’re going to take a look at upgrading the 165mm speakers in the four doors, and adding bass blockers to the 89mm speakers added in the last article. Continue reading “Car Audio System Upgrade – Part 2”
Author: daveh
Car Audio System Upgrade – Part 1
 I got a new (to me) car and, while I love it, the sound system is pretty crap. So I decided to investigate what could be done to improve it. Research showed me that the Mazda 6 has two options when it comes to the default sound system, one is a standard 4-speaker setup, and the other is an 11-speaker Bose sound sytem. Continue reading “Car Audio System Upgrade – Part 1”
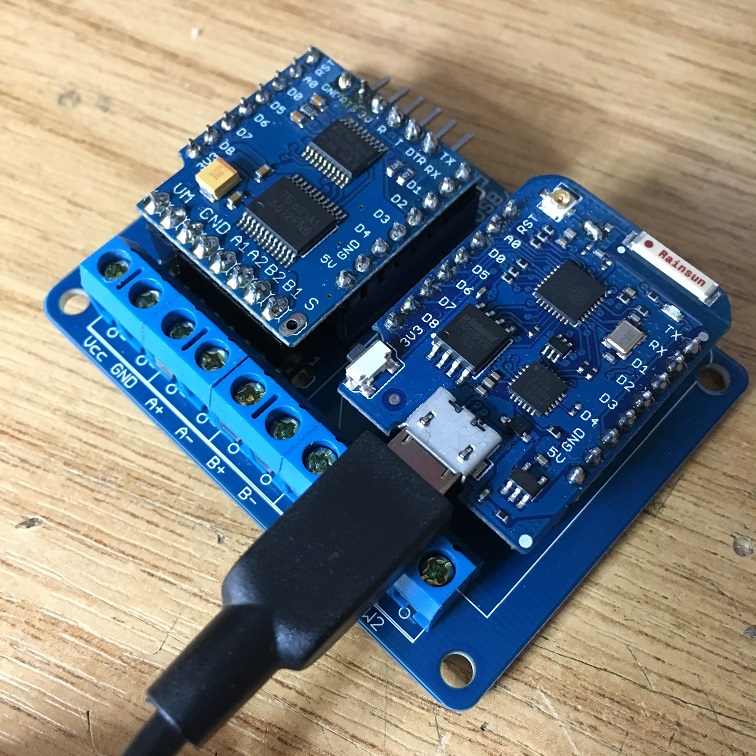
Get your IOT Project onto the Cellular Network for ~$10
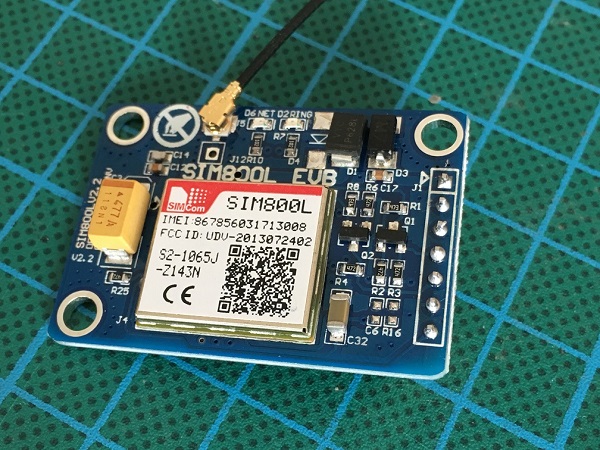 I’ve been toying a lot recently with LoRaWAN networking, even going so far as to build a full gateway and mounting it on my house. As an alternative, I ordered some GSM shields from AliExpress which connect into your existing GSM providers network. It saves building a gateway, although the running costs will probably be higher.
Continue reading “Get your IOT Project onto the Cellular Network for ~$10”
LoRaWAN Gateway Build with Raspberry Pi
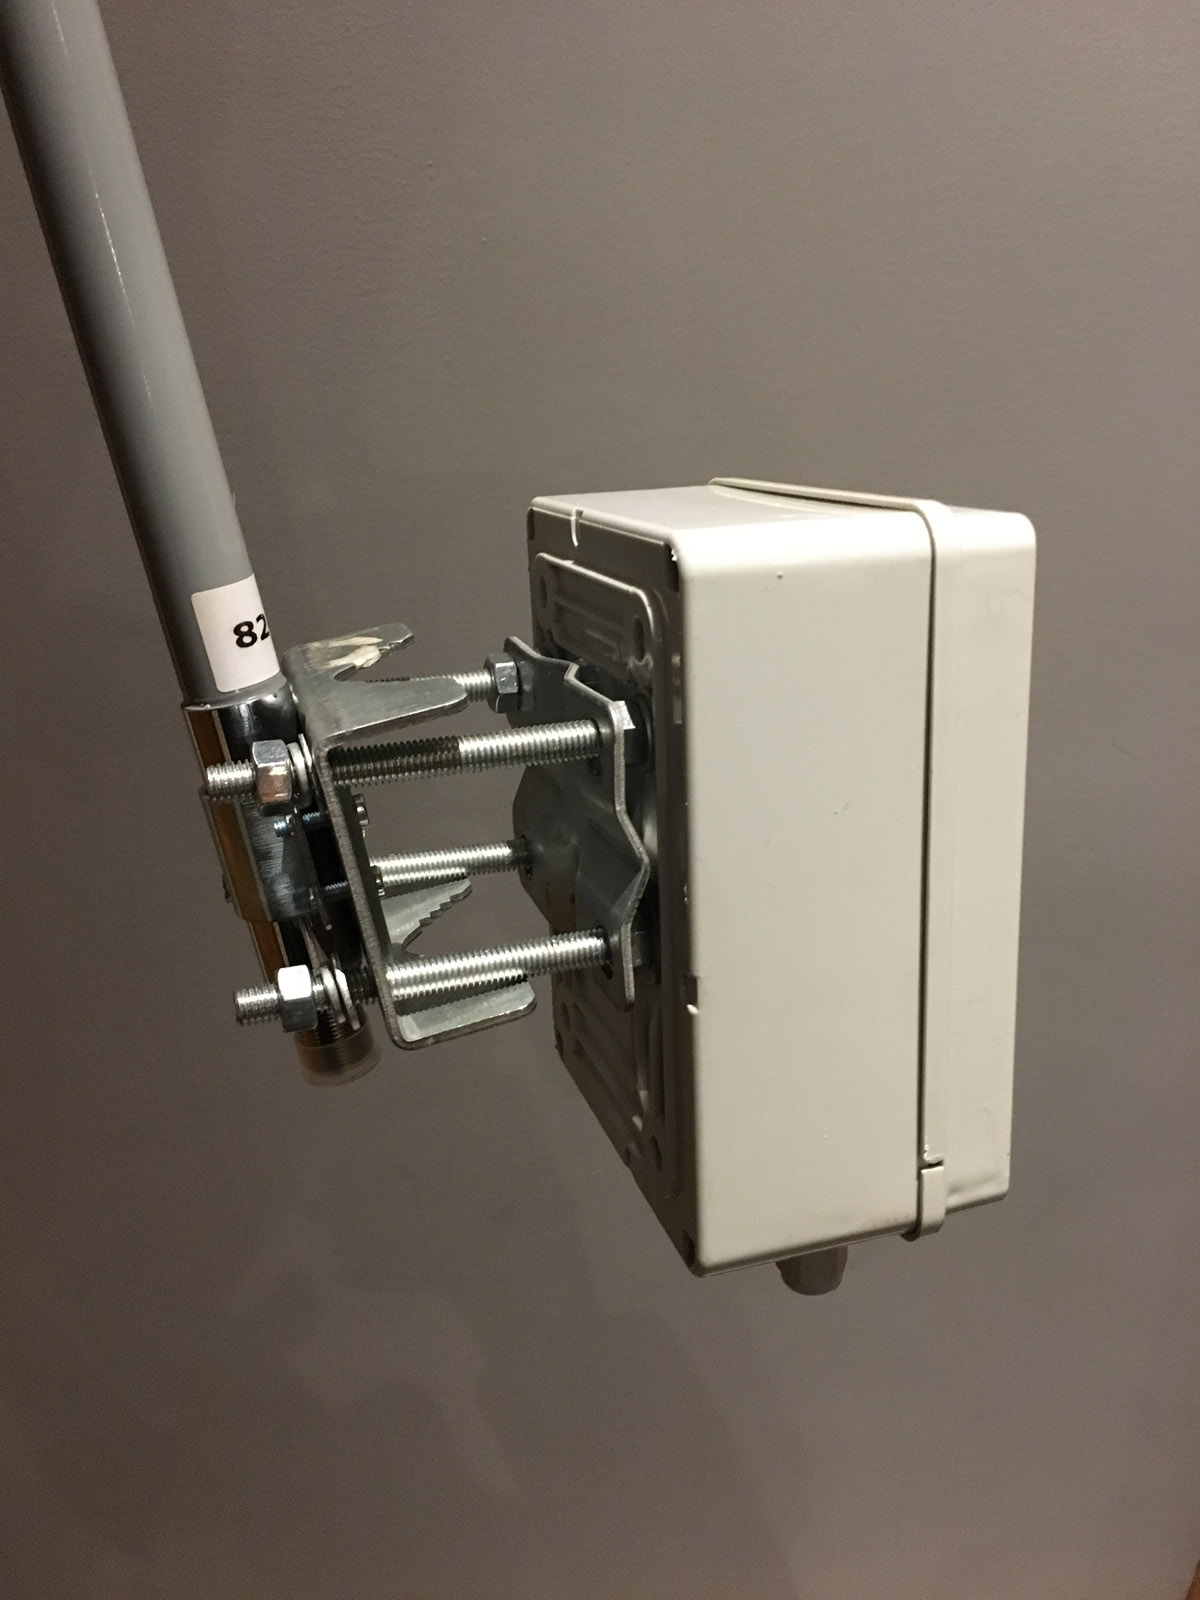 A few months back I built a full LoRaWAN gateway node for The Things network, and now I’m finally getting around to writing it up. I’d recommend this project to anyone interested in IOT, as it’s very edudational, and you’ll be helping expand the LoRaWAN network coverage in your area. In this build, I use a Raspberry Pi, a RAK831 8-channel gateway and an adapter board (also from RAK) that allows the RAK board to be mounted easily on the Pi.
4-20mA Level Sensor for Kerosene Tank
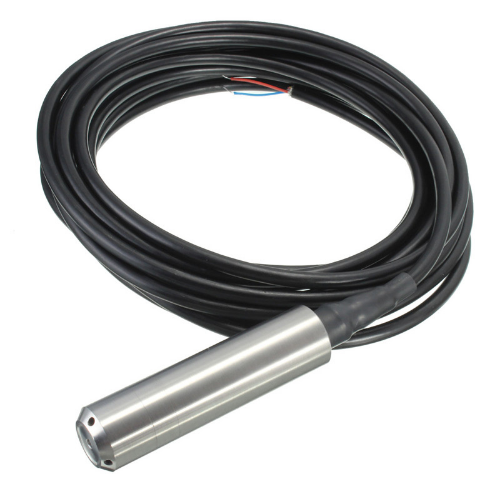 I’ve been using an ultrasonic sensor in my Kerosene Tank (Home Heating Oil) for a while now, but was not happy with the stability of the readings. Especially on relatively warm days, as the fumes in the tank seemed to confuse the readings. So I decided to try a different type of sensor, in the form of a 4-20mA Liquid Level sensor. This article shows the setup and compares to the ultrasonic sensor.
3D-printed DSLR Timelapse Controller
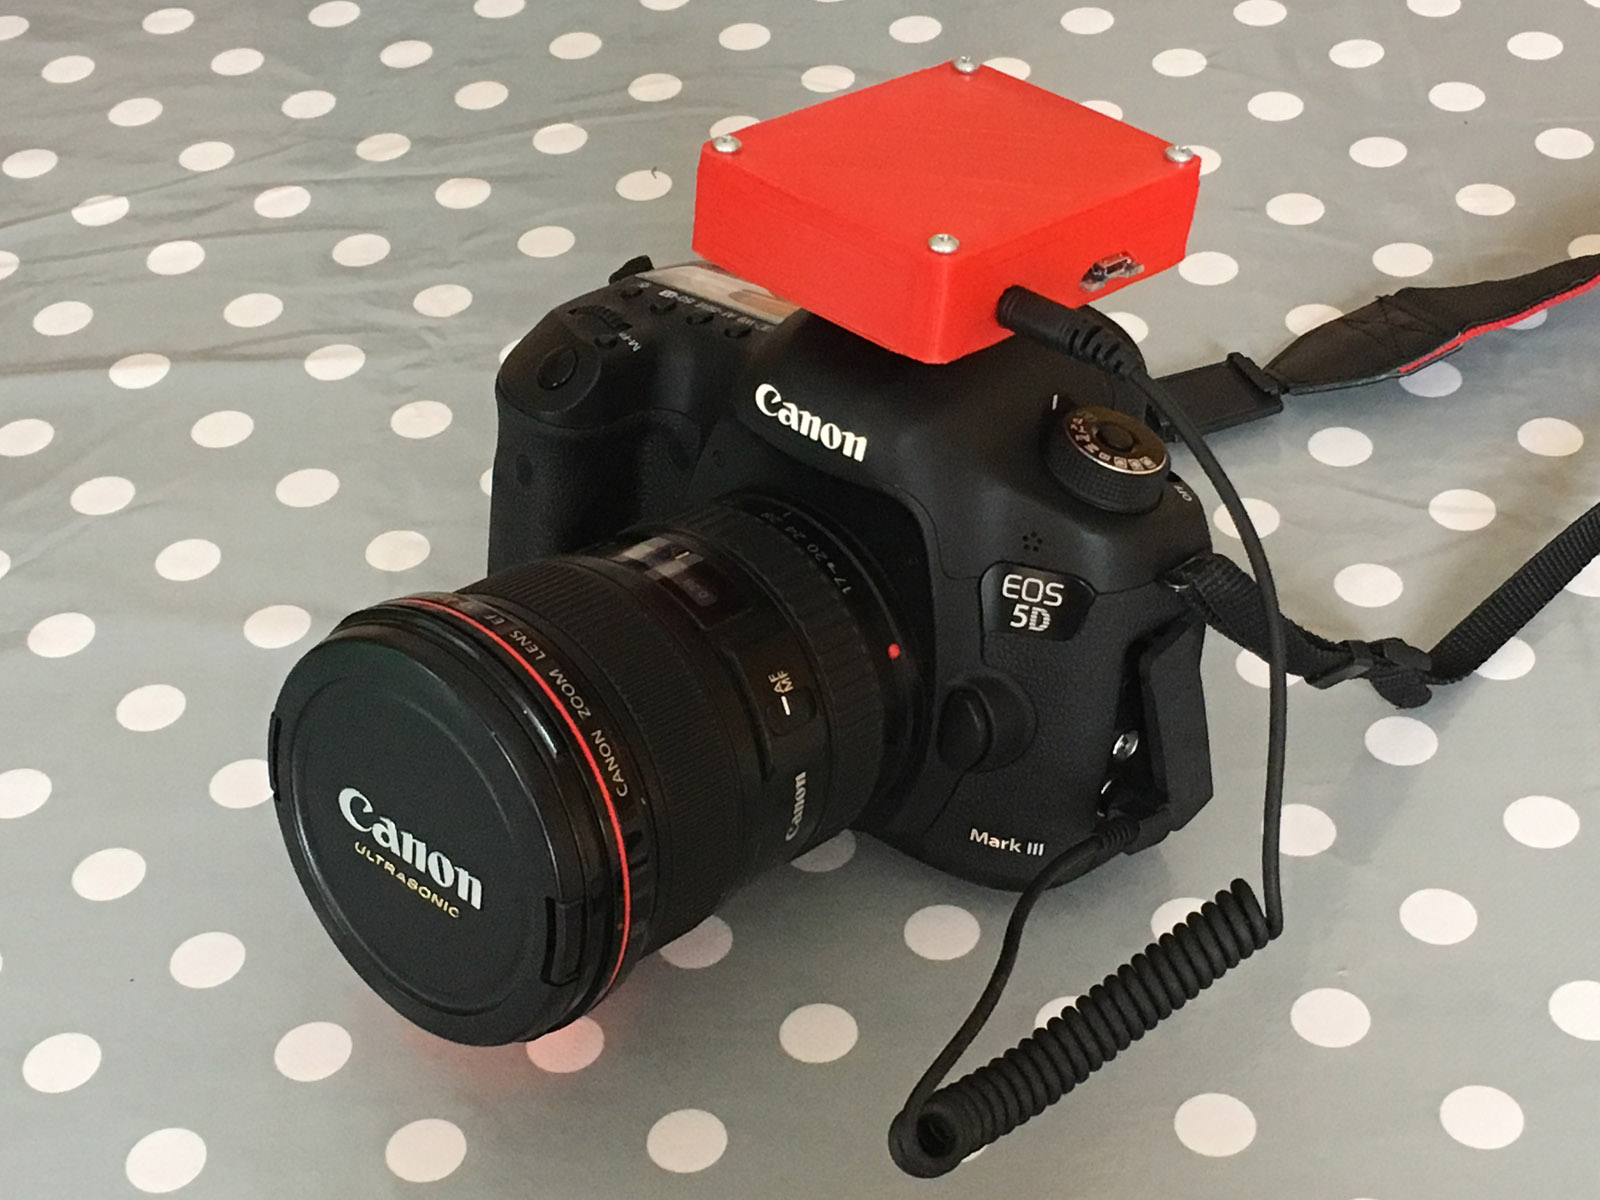 Here’s a new revisison of a type of device I’ve been playing with for a long while, a DSLR Timeplapse Controller. This one is ESP8266 based, and creates a hotspot to allow you to set up the timelapse parameters, and easily run a timelapse from your smartphone.
openlapse Time-Lapse Rail Interactive 3D Models
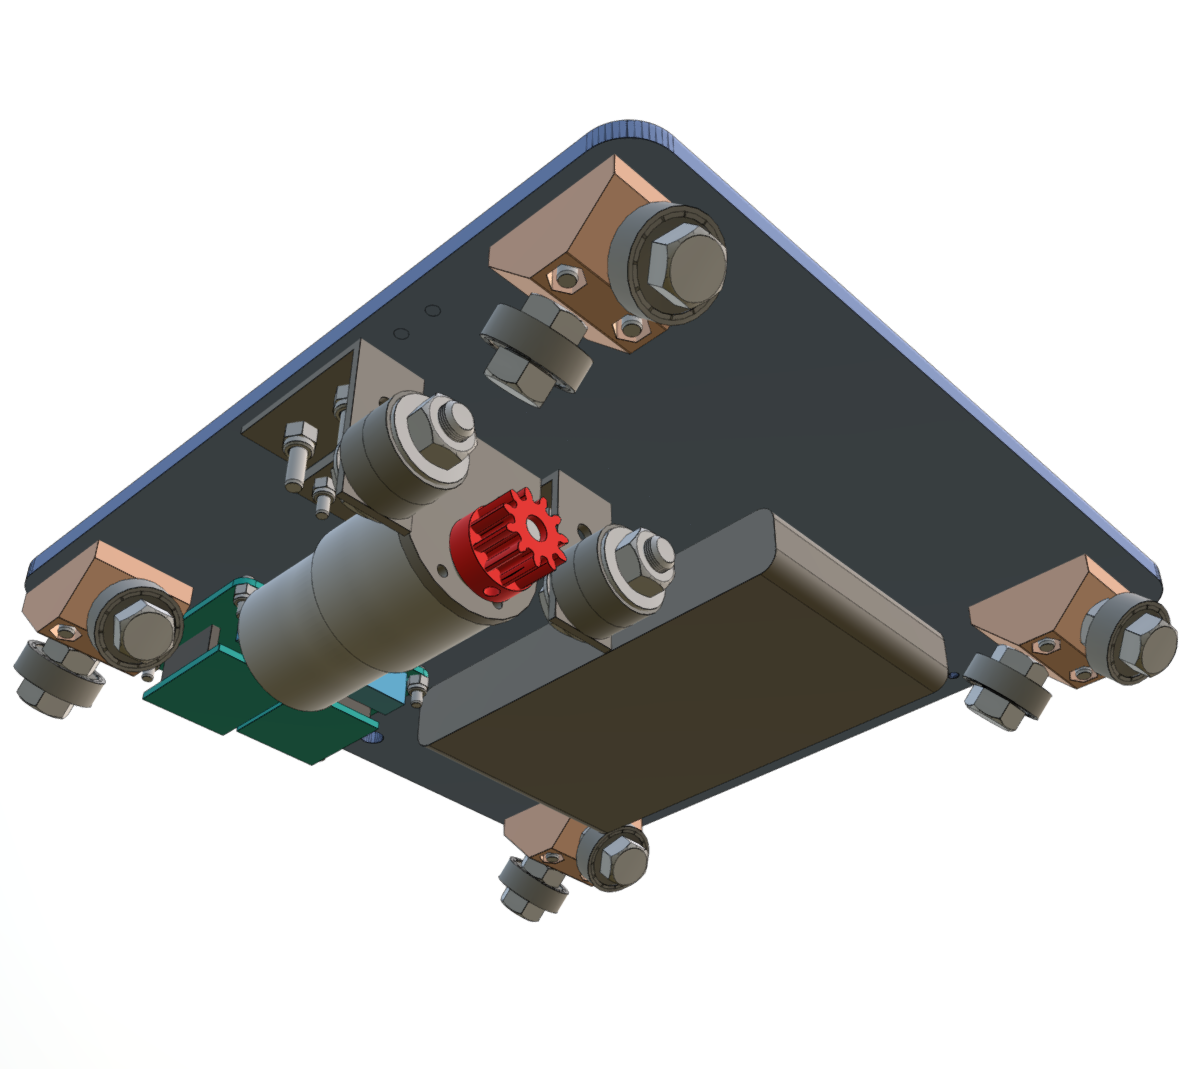 Here’s a few 3D models of the time-lapse rail I’ve been working on. I’ve put a good bit of time into the models, as I feel it’s a good way of showing how the construction is done for the various parts of the rail. The last model is of the complete rail. I still have a few parts to add, like the Tripod Head and WiFi Antenna, but they do demonstrate the construction nicely.
See the Github repo for models, electronics designs, laser cutting info, software, etc. I’m adding more and more to that as I get the time. In the near future there should be enough info for people to easily build their own rails. And there are other posts in this blog showing more. Be sure to check them out.
Continue reading “openlapse Time-Lapse Rail Interactive 3D Models”
Seeed Studios Versus OSH Park Shipping to Ireland
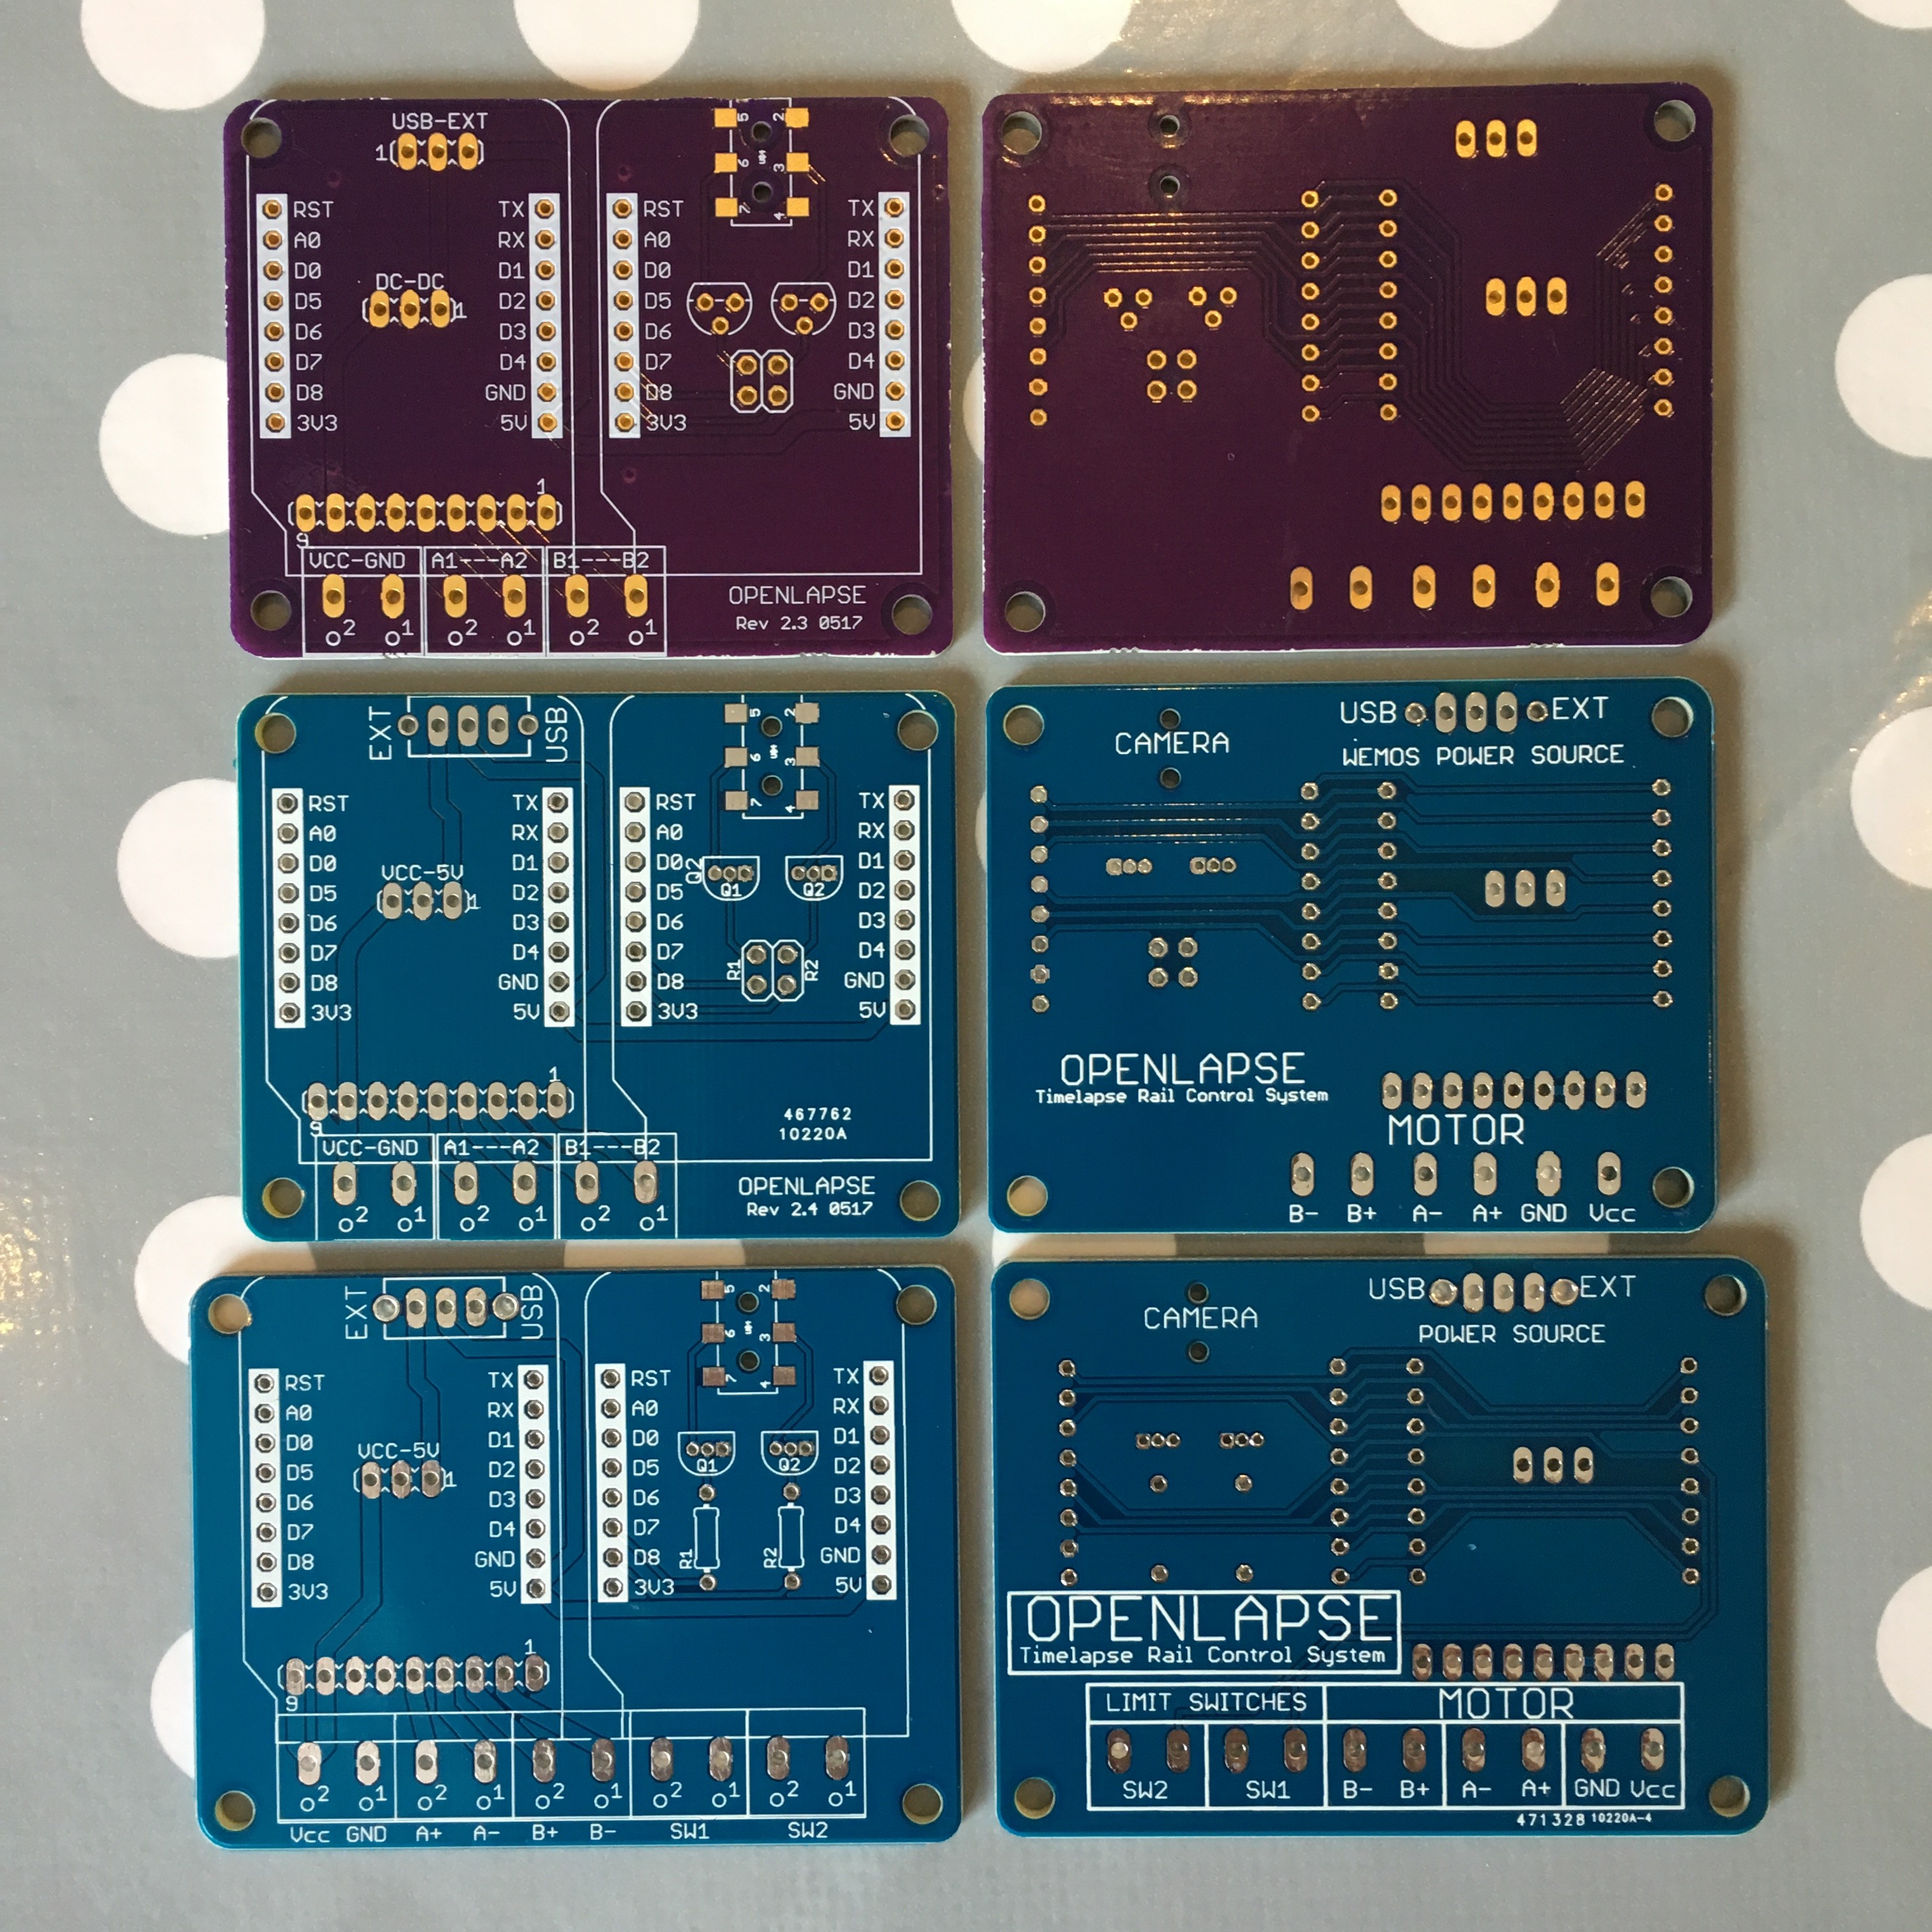 So I ordered three sets of PCBs from OSH Park (USA) and Seeed Studios (China). They were ordered very close to each other. Here’s a breakdown on how quick they got here, and how much they cost. Interestingly, they all shipped the same day (June 5th).
Continue reading “Seeed Studios Versus OSH Park Shipping to Ireland”
Flashing the OpenLapse binary
 In order to use the OpenLapse controller, it’s necessary to flash the firmware onto it. This article describes how to do that, and when you’re complete, you should be able to connect into the ‘openlapse’ WiFi hotspot with your smartphone and control your DSLR and motor. Even if you don’t have the additional hardware, you can still play with the user interface. I’d appreciate feedback. 🙂
OpenLapse Timelapse Controller Parts and Assembly
Here’s the first in a series of posts on my Open Source Hardware project, entitled OpenLapse, which is a rail system for timelapse photography, including everything from the electronics, software, and physical hardware designs. It’s an evolution of a previous project, the Raspberry Pi based Timelaspe Rail, but this is designed to be simpler to build and use. A web interface is presented from the controller which generates a WiFi hotspot, and the user can chance the parameters for the timelapse, as well as manually control the motors on the rail.
Continue reading “OpenLapse Timelapse Controller Parts and Assembly”